Quickstart: ngrok-go
This quickstart will use the ngrok-go Agent SDK to put a Go app on the internet and secure it so that only you can access it.
What is ngrok-go?
ngrok-go is an open-source, idiomatic Go package for embedding secure ingress directly into your Go applications. If you’ve used the ngrok agent before, you can think of ngrok-go as the agent packaged as a Go library.
ngrok-go enables you to serve Go applications on the internet in a single line
of code without configuring network minutia like routing, load balancers,
certificates, or ports. Applications using ngrok-go listen on ngrok’s global
network and your app gets the same net.Listener interface it would get if it
had listened on a local port. This makes it incredibly simple to drop ngrok-go
into any existing Go code.
You may want to open the ngrok-go package documentation on pkg.go.dev as you work through this guide.
Step 1: Install ngrok-go
Create a new Go module and install ngrok-go. This guide assumes you already have Go installed.
mkdir ngrok-go-quickstart
cd ngrok-go-quickstart
go mod init ngrok-go-quickstart
go get golang.ngrok.com/ngrok
Step 2: Create your app
In the ngrok-go-quickstart directory, create the following main.go file:
package main

import (
	"context"
	"fmt"
	"log"
	"net/http"

	"golang.ngrok.com/ngrok"
	"golang.ngrok.com/ngrok/config"
)

func main() {
	if err := run(context.Background()); err != nil {
		log.Fatal(err)
	}
}

func run(ctx context.Context) error {
	listener, err := ngrok.Listen(ctx,
		config.HTTPEndpoint(),
		ngrok.WithAuthtokenFromEnv(),
	)
	if err != nil {
		return err
	}

	log.Println("App URL", listener.URL())
	return http.Serve(listener, http.HandlerFunc(handler))
}

func handler(w http.ResponseWriter, r *http.Request) {
	fmt.Fprintln(w, "<h1>Hello from ngrok-go!</h1>")
}
- Lines 20-23: connect to ngrok and create a net.Listener for a randomly-assigned HTTP endpoint URL
- Line 22: use the value of the
NGROK_AUTHTOKENenvironment variable to auth with ngrok - Line 29: serve a simple http handler using Go's
net/http.Servefunction
Step 3: Run it!
Copy the ngrok authtoken on your dashboard. You may need to sign up for ngrok if you haven't already.
Run your application with your authtoken in the environment:
NGROK_AUTHTOKEN="<TOKEN>" go run main.go
Your terminal will print out your app's URL. Visit the URL in a browser and confirm you see "Hello from ngrok-go!". Your Go application is now live on the internet, with a URL that anyone on the internet can access. Test it out by sending it to a friend!
Step 4: Always use the same domain
If you want to keep the same URL each time you run your app, create a static
domain on your dashboard and
then update your ngrok.Listen function call to use it. Stop your app with
Ctrl+C, update your code and then rerun it:
	listener, err := ngrok.Listen(ctx,
		config.HTTPEndpoint(
			config.WithDomain("jumpy-red-mollusk.ngrok-free.app"),
		),
		ngrok.WithAuthtokenFromEnv(),
	)
Step 5: Secure your app
You may not want everyone to be able to access your application. ngrok can quickly add authentication to your app with a few lines of code.
If your Google account is alan@example.com, you can restrict access only for
yourself by modifying your main.go file to:
package main

import (
	"context"
	"fmt"
	"log"
	"net/http"

	"golang.ngrok.com/ngrok"
	"golang.ngrok.com/ngrok/config"
)

func main() {
	if err := run(context.Background()); err != nil {
		log.Fatal(err)
	}
}

func run(ctx context.Context) error {
	listener, err := ngrok.Listen(ctx,
		config.HTTPEndpoint(
			config.WithOAuth("google",
				config.WithAllowOAuthEmail("alan@example.com"),
			),
		),
		ngrok.WithAuthtokenFromEnv(),
	)
	if err != nil {
		return err
	}

	log.Println("App URL", listener.URL())
	return http.Serve(listener, http.HandlerFunc(handler))
}

func handler(w http.ResponseWriter, r *http.Request) {
	fmt.Fprintln(w,
		"<h1>Hello from ngrok-go, %s.</h1>",
		r.Header.Values("ngrok-auth-oauth-email"),
	)
}
- Line 22: Require visitors to authenticate with Google before they access your application. You can choose other providers.
- Line 23: Only allow
alan@example.comaccess to the application - Line 39: Print the authenticated user's email address from a request header. See what headers are populated by the OAuth Module.
Run your app again and visit the URL it prints in the terminal.
Anyone accessing your app will be prompted to log in with Google and only your account will be allowed to access it. Keep in mind that when you restarted ngrok, your app's URL changed, so make sure to visit the new one.
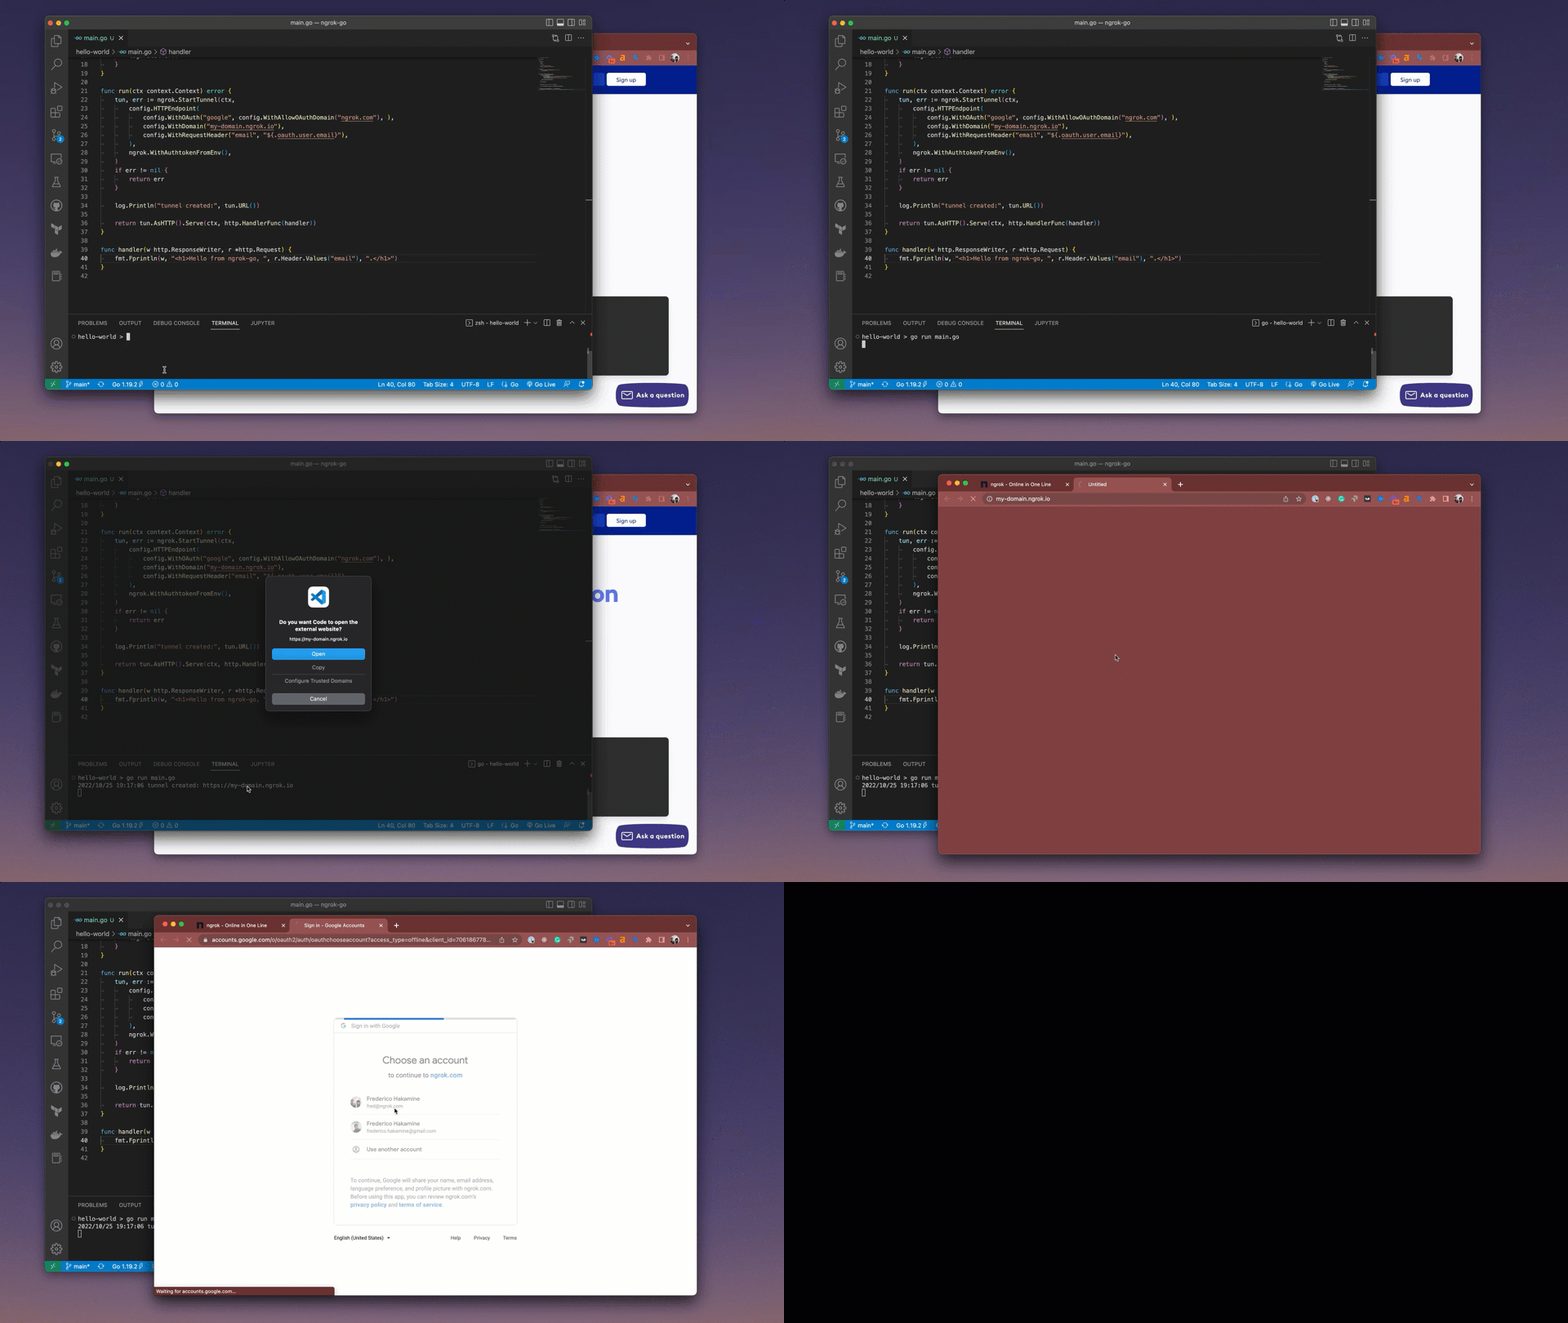
Here's the full result:

Next Steps
- Read the ngrok-go package documentation on pkg.go.dev
- Star the ngrok-go GitHub repo and follow it for updates.
- Browse Go examples of HTTP Endpoints of other ways ngrok can augment your application.
- Bring your own custom domain to ngrok
- Create connectivity for non-HTTP protocols such as SSH, RDP, or game servers using TCP Endpoints