Azure Active Directory SSO (SAML)
To have ngrok enforce Single Sign-On using SAML with Azure Active Directory (Azure AD):
This article details how to configure Azure AD as an Identity Provider for your ngrok Edge. By integrating Azure AD with ngrok, you can:
- Restrict access to ngrok tunnels to only users who authenticated via Azure AD
- Configure Azure AD and ngrok to enforce user and group authorization
- Use Azure AD's dashboard to facilitate access to ngrok applications
Requirements
To configure ngrok tunnels with Azure AD, you must have:
- an ngrok Enterprise Account with an authtoken or admin access to configure edges with SAML
- a Microsoft Azure account with access to an Azure AD tenant
Step 1: Create an ngrok Edge
-
Go to the ngrok dashboard
-
Click Cloud Edge > Edges
-
Create an Edge:
- Click New Edge
- Click HTTPS Edge
- Click the Pencil Icon next to "no description". Enter Edge With Azure Active Directory SSO as the Edge name and click Save
-
Configure the SAML module for this Edge:
- On the Routes section, click SAML
- Click Begin setup
- In the Identity Provider section, copy the following XML as a placeholder into the input box
<EntityDescriptor xmlns="urn:oasis:names:tc:SAML:2.0:metadata"></EntityDescriptor>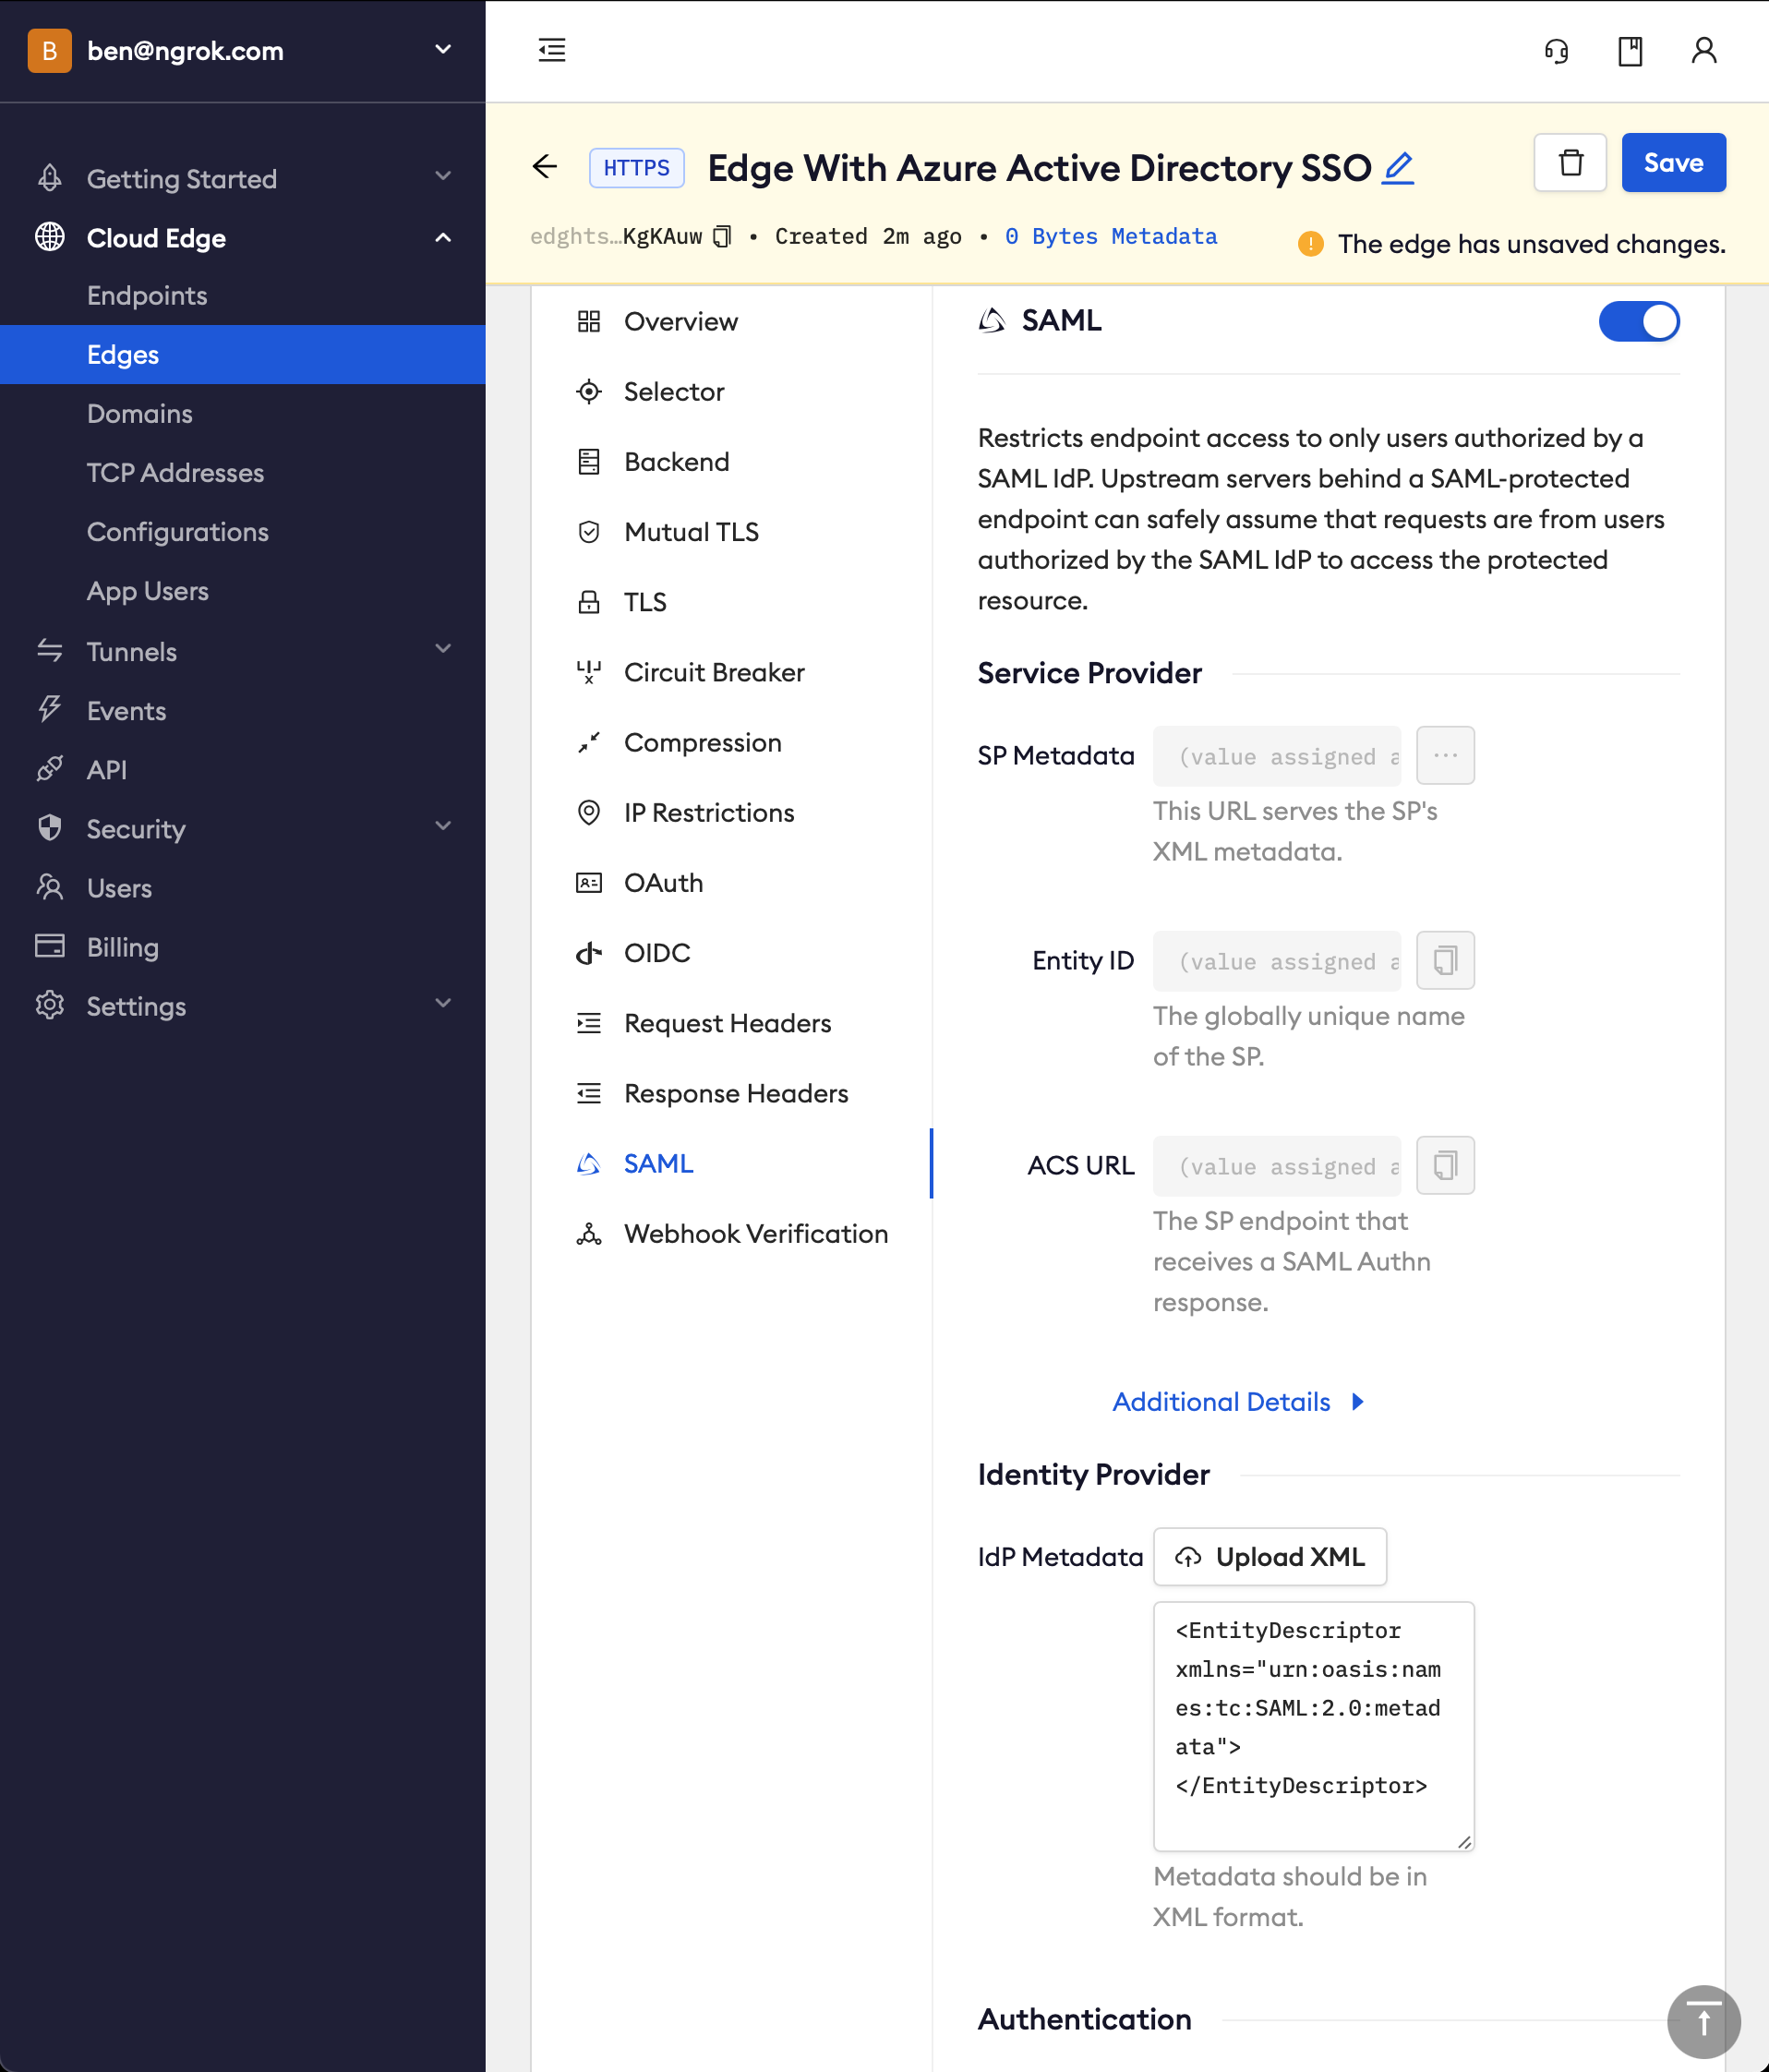
-
Click Save
-
Note that ngrok has now generated values for the fields in the Service Provider section. You will need to configure Azure AD with these values later
Step 2: Create an Azure AD application
-
Go to your Azure AD tenant in Azure
-
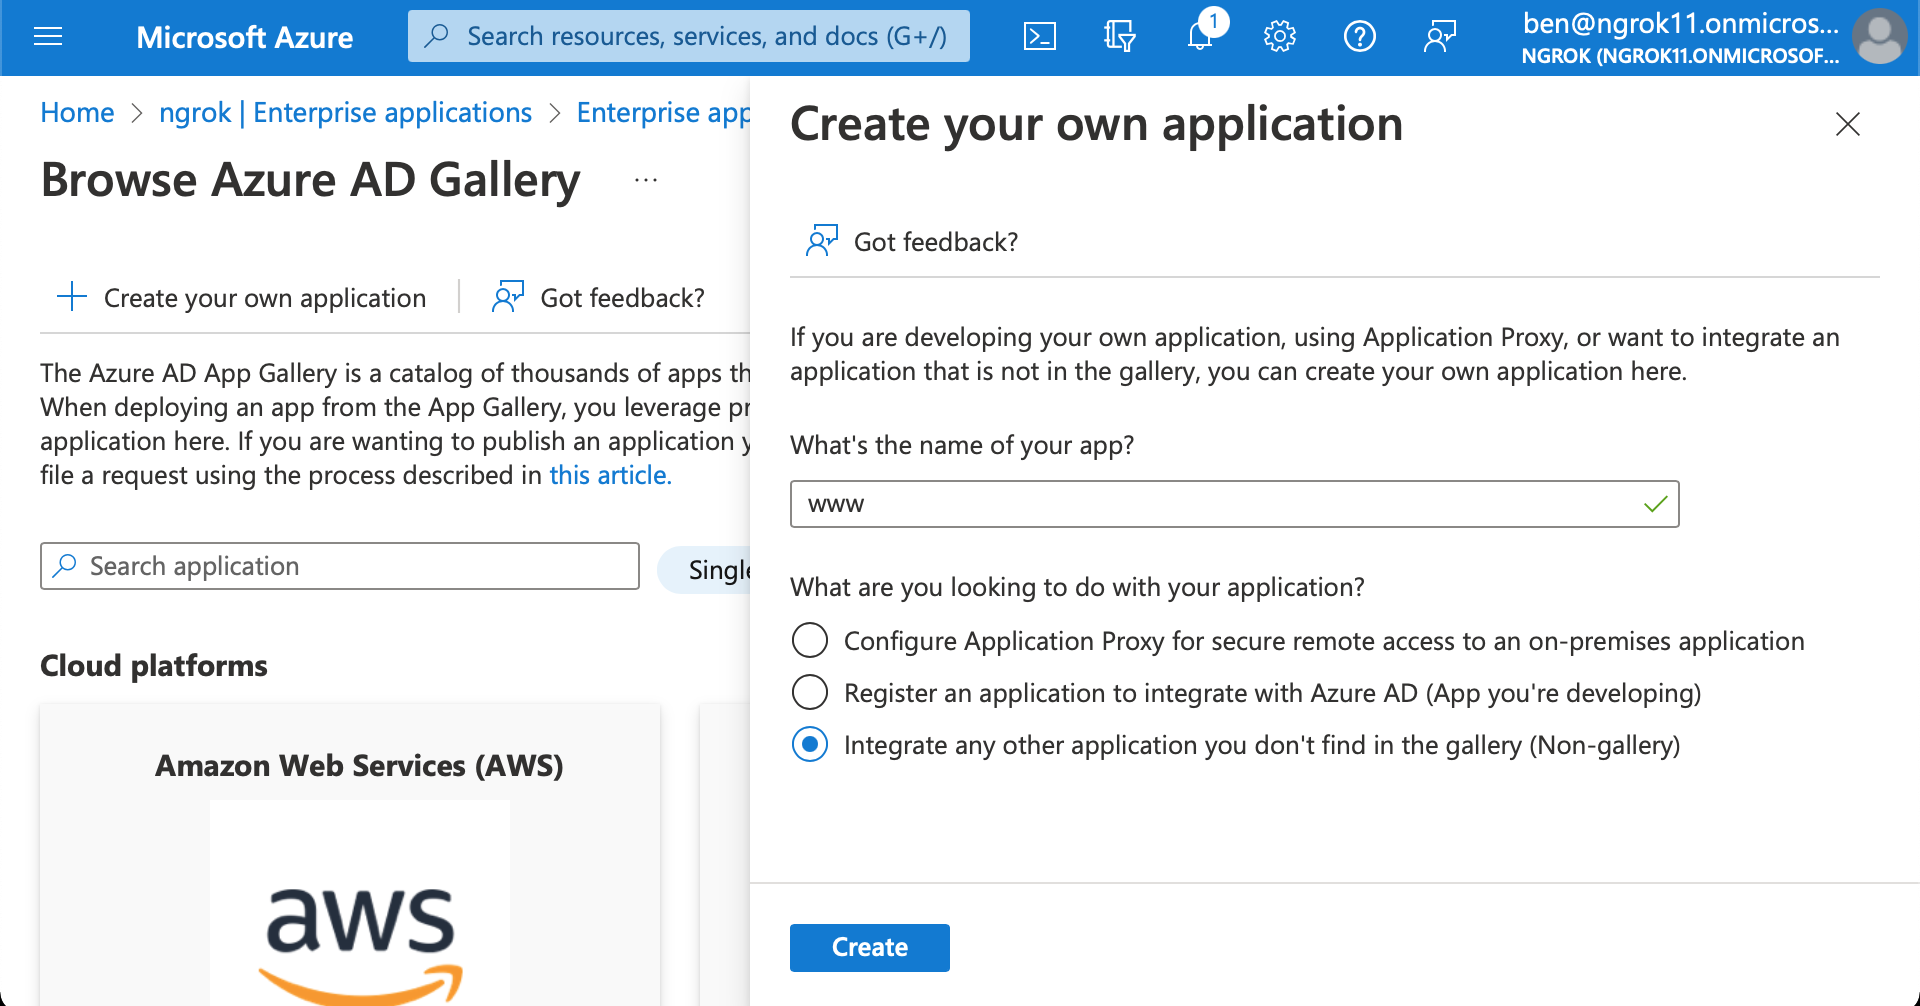
Create an enterprise application
- Starting from the sidebar, in the Manage section, click Enterprise Applications > New application
- Give your application a name (eg
wwwfor a website client). Click Create
-
To assign users/groups for this application, in the Getting Started section, click 1. Assign users and groups > Add user/group
-
Set up single sign on with SAML
- In the Getting Started section, click on the box titled 2. Set up single sign on > SAML
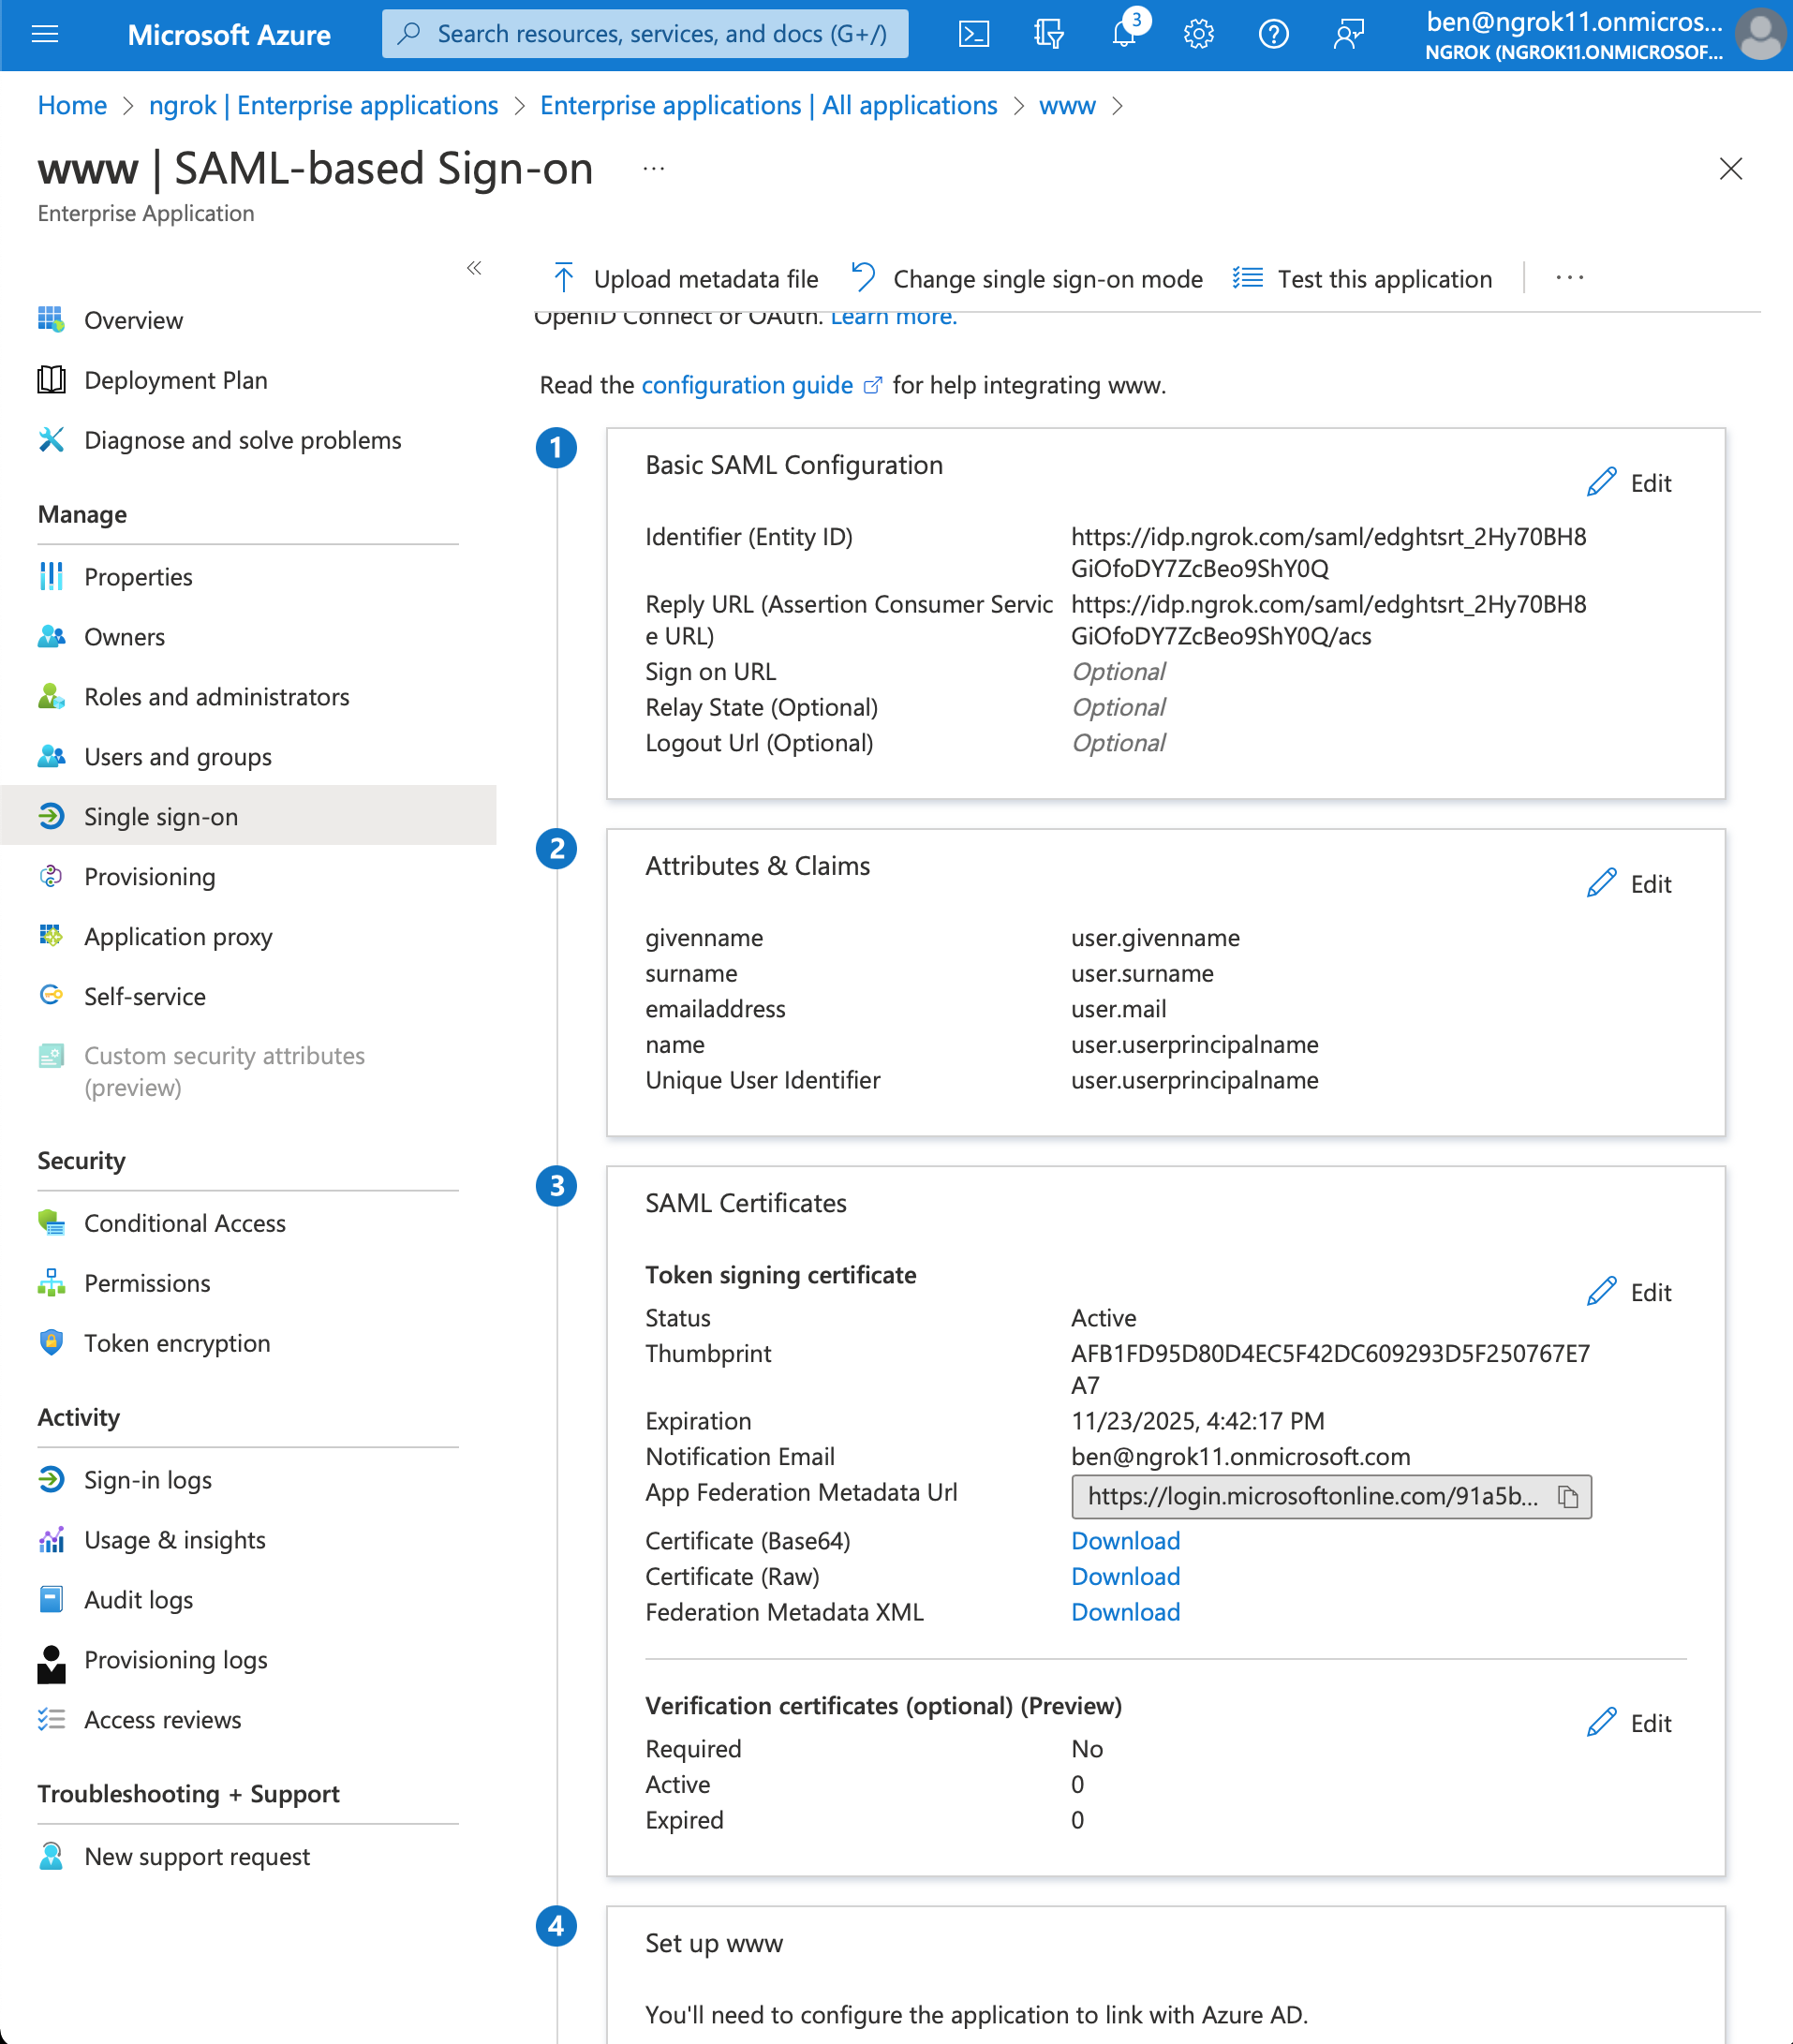
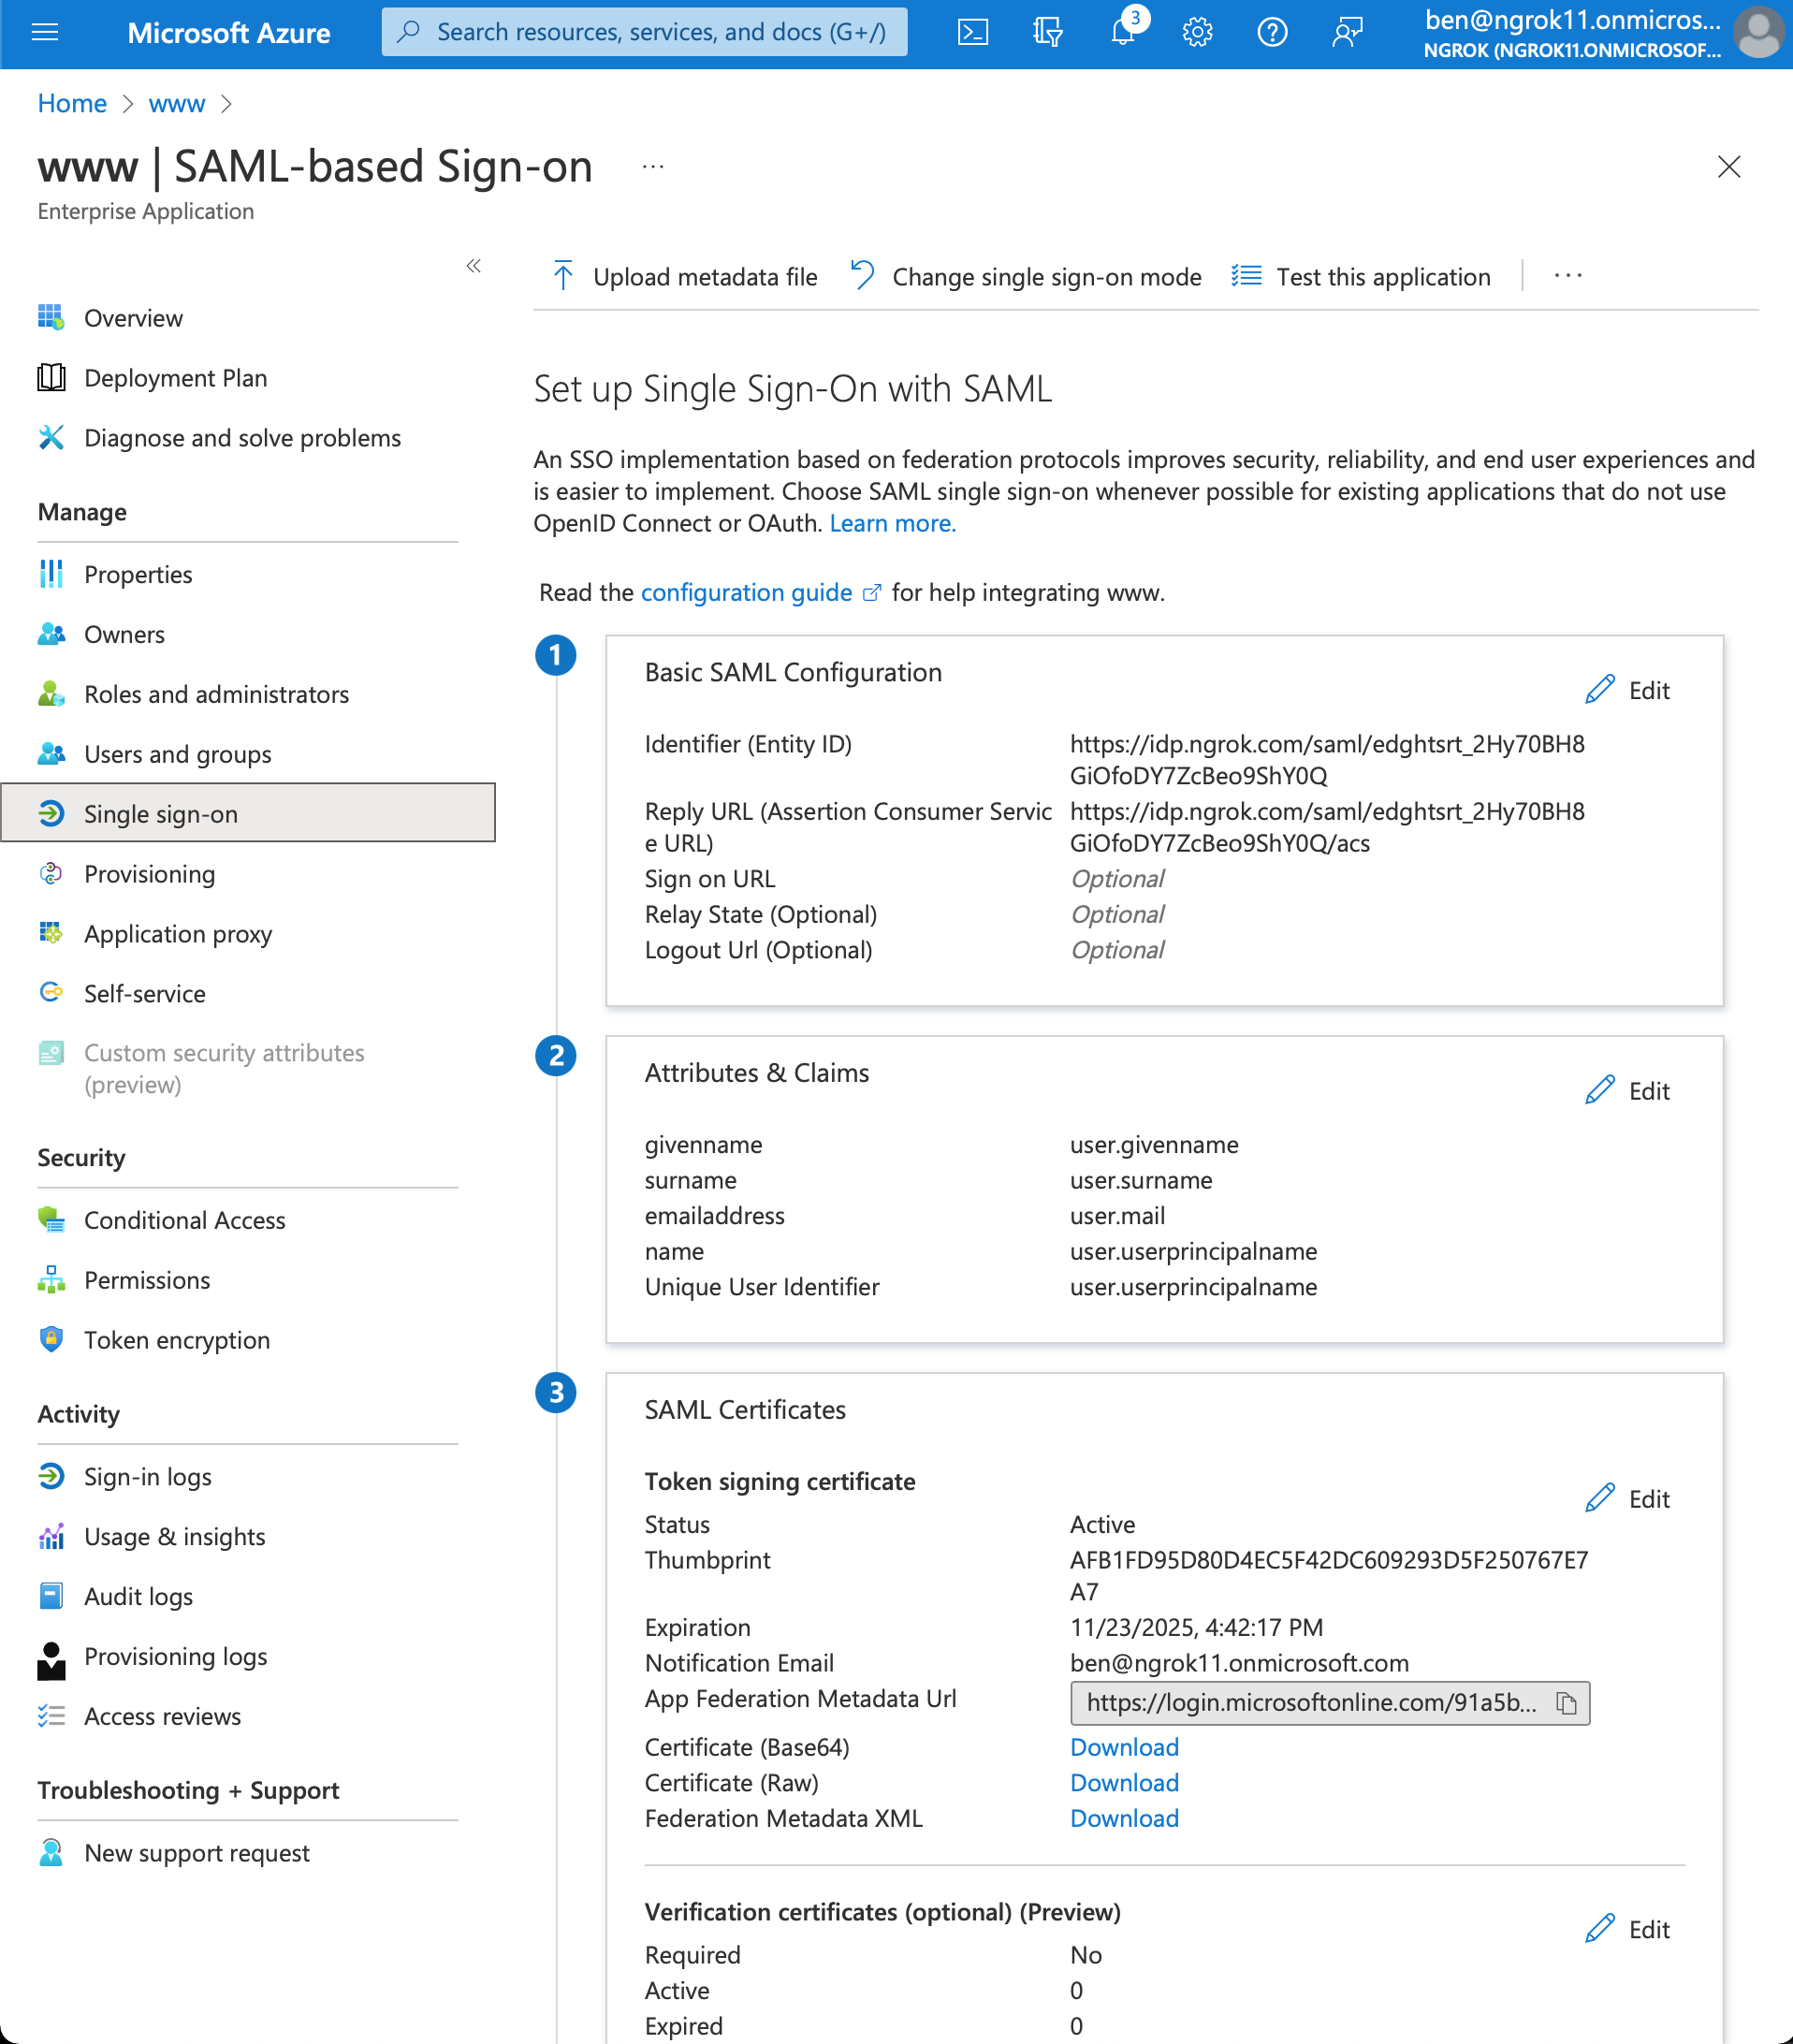
- Configure SAML. In the Basic SAML Configuration box click Edit
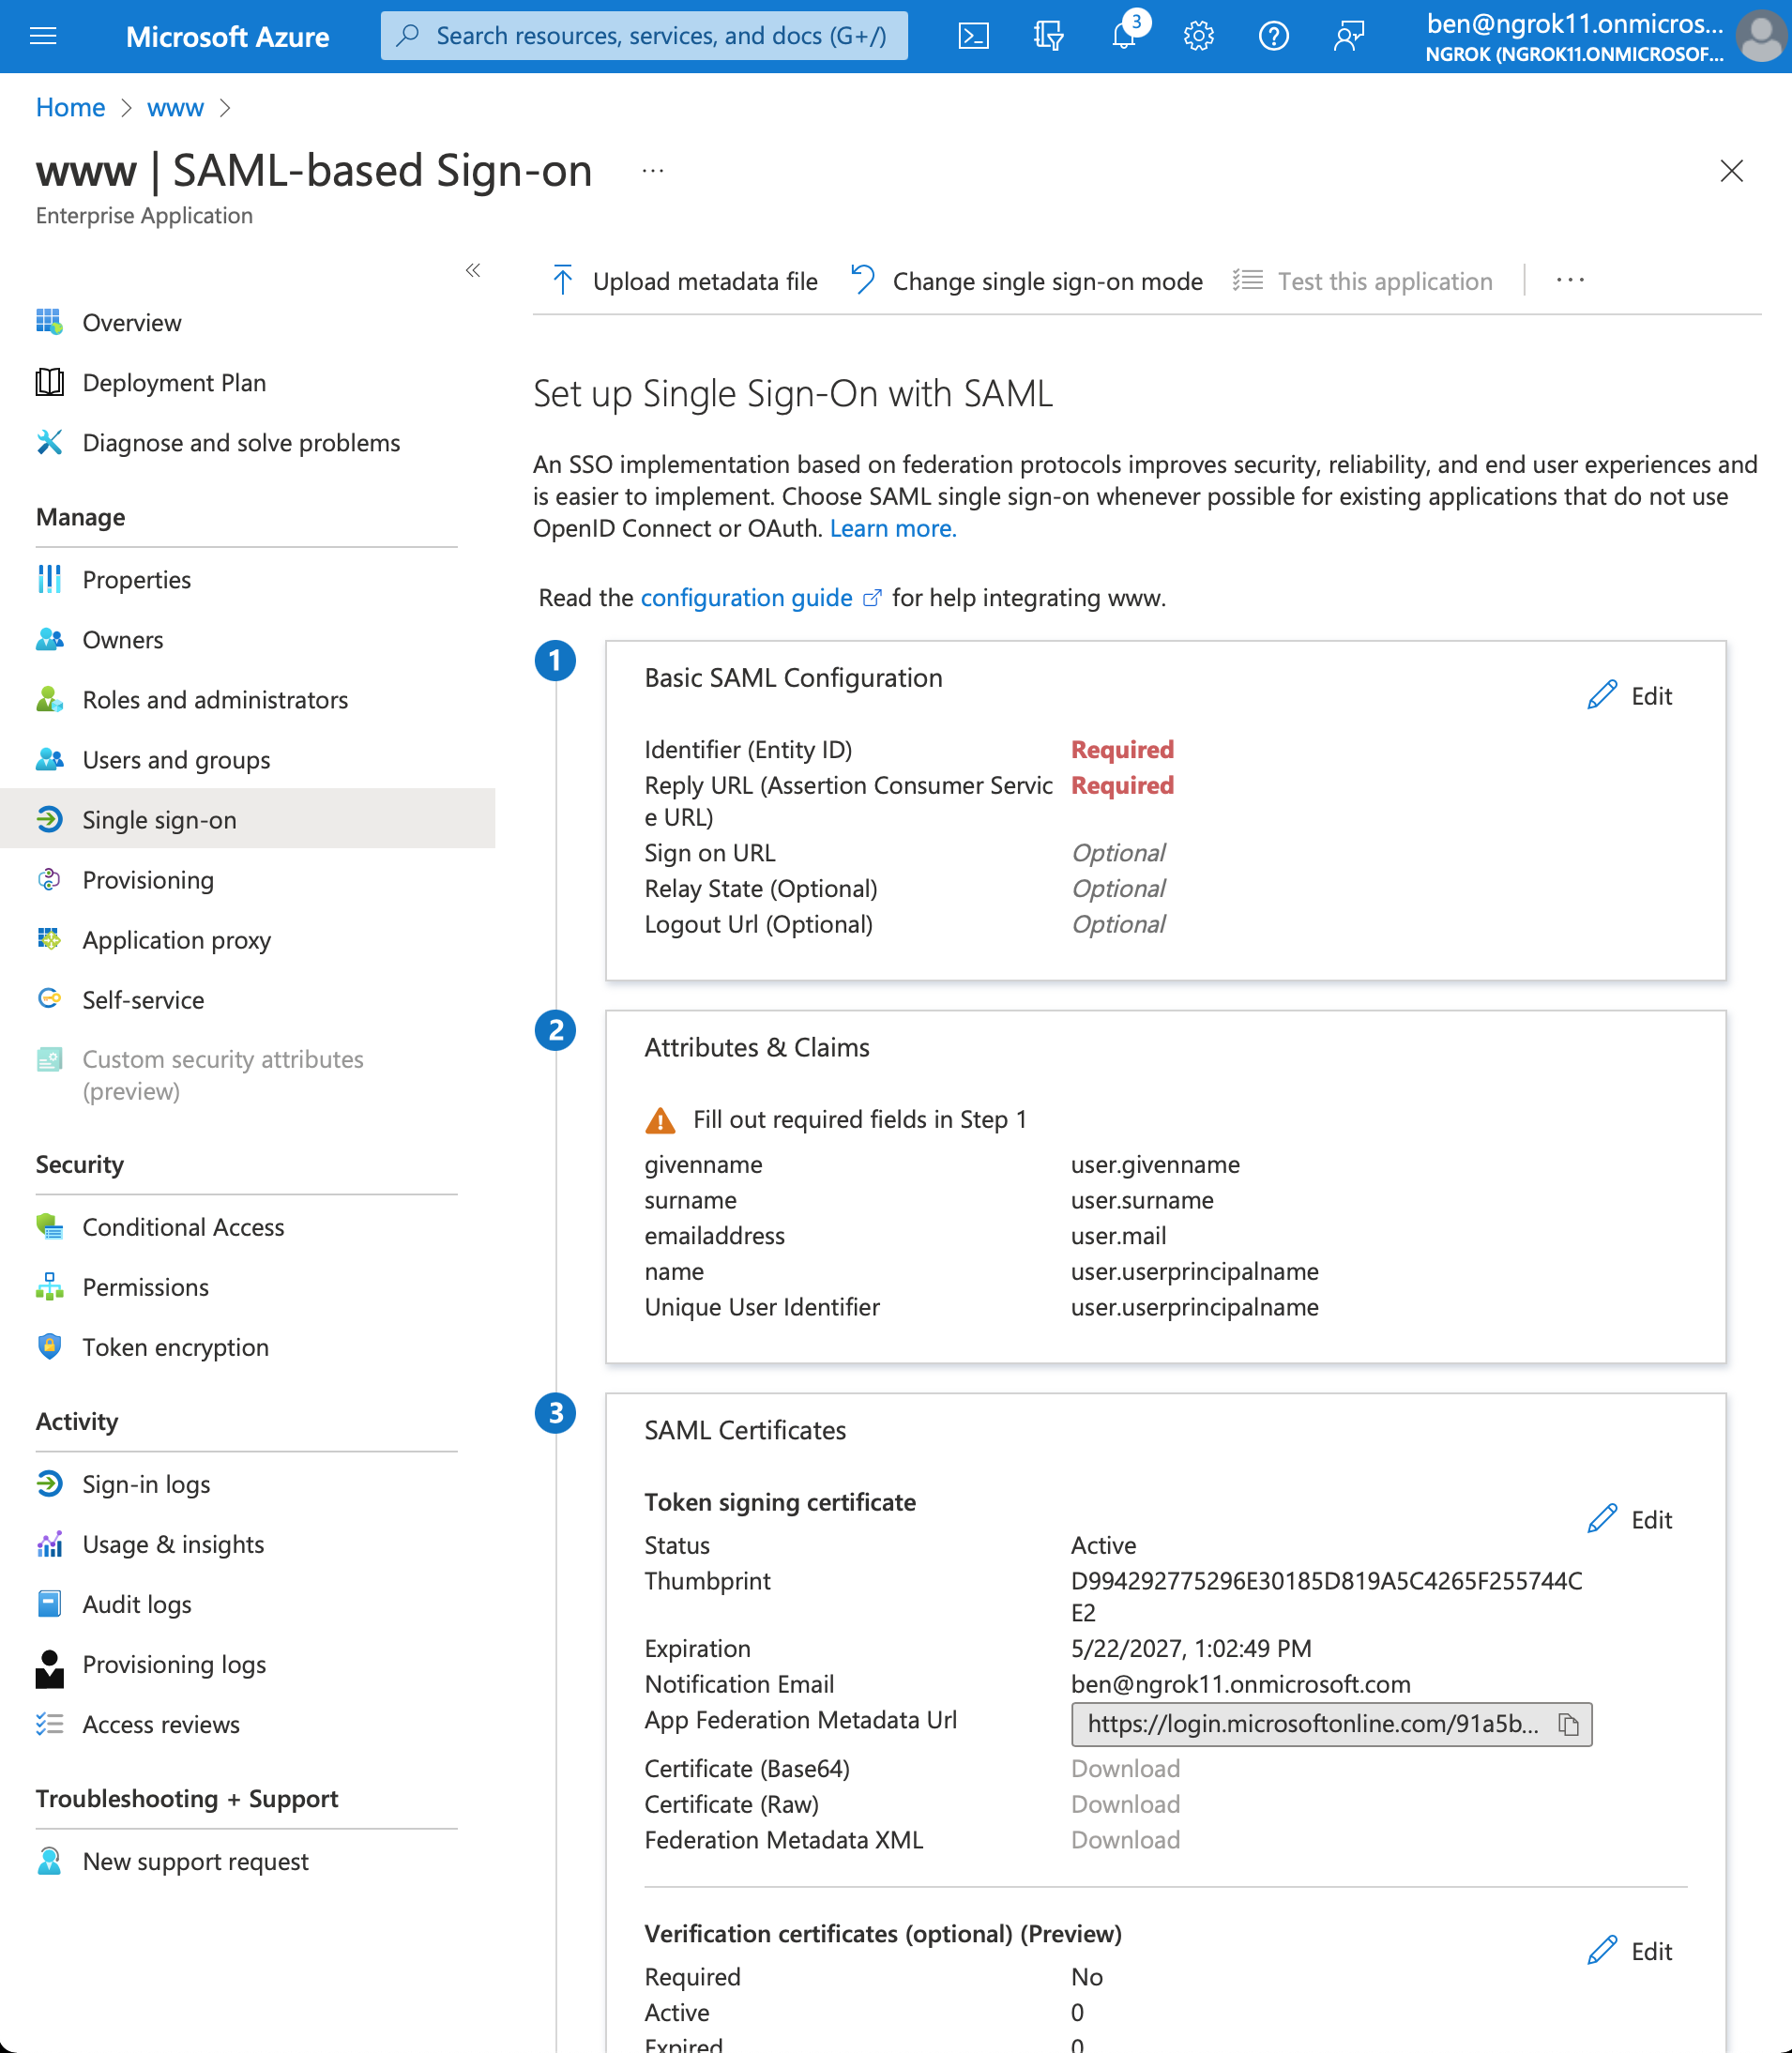
- Add Identifier (Entity ID) and Reply URL (Assertion Consumer Service URL) values using the previously the ngrok generated Entity ID and ACS URL
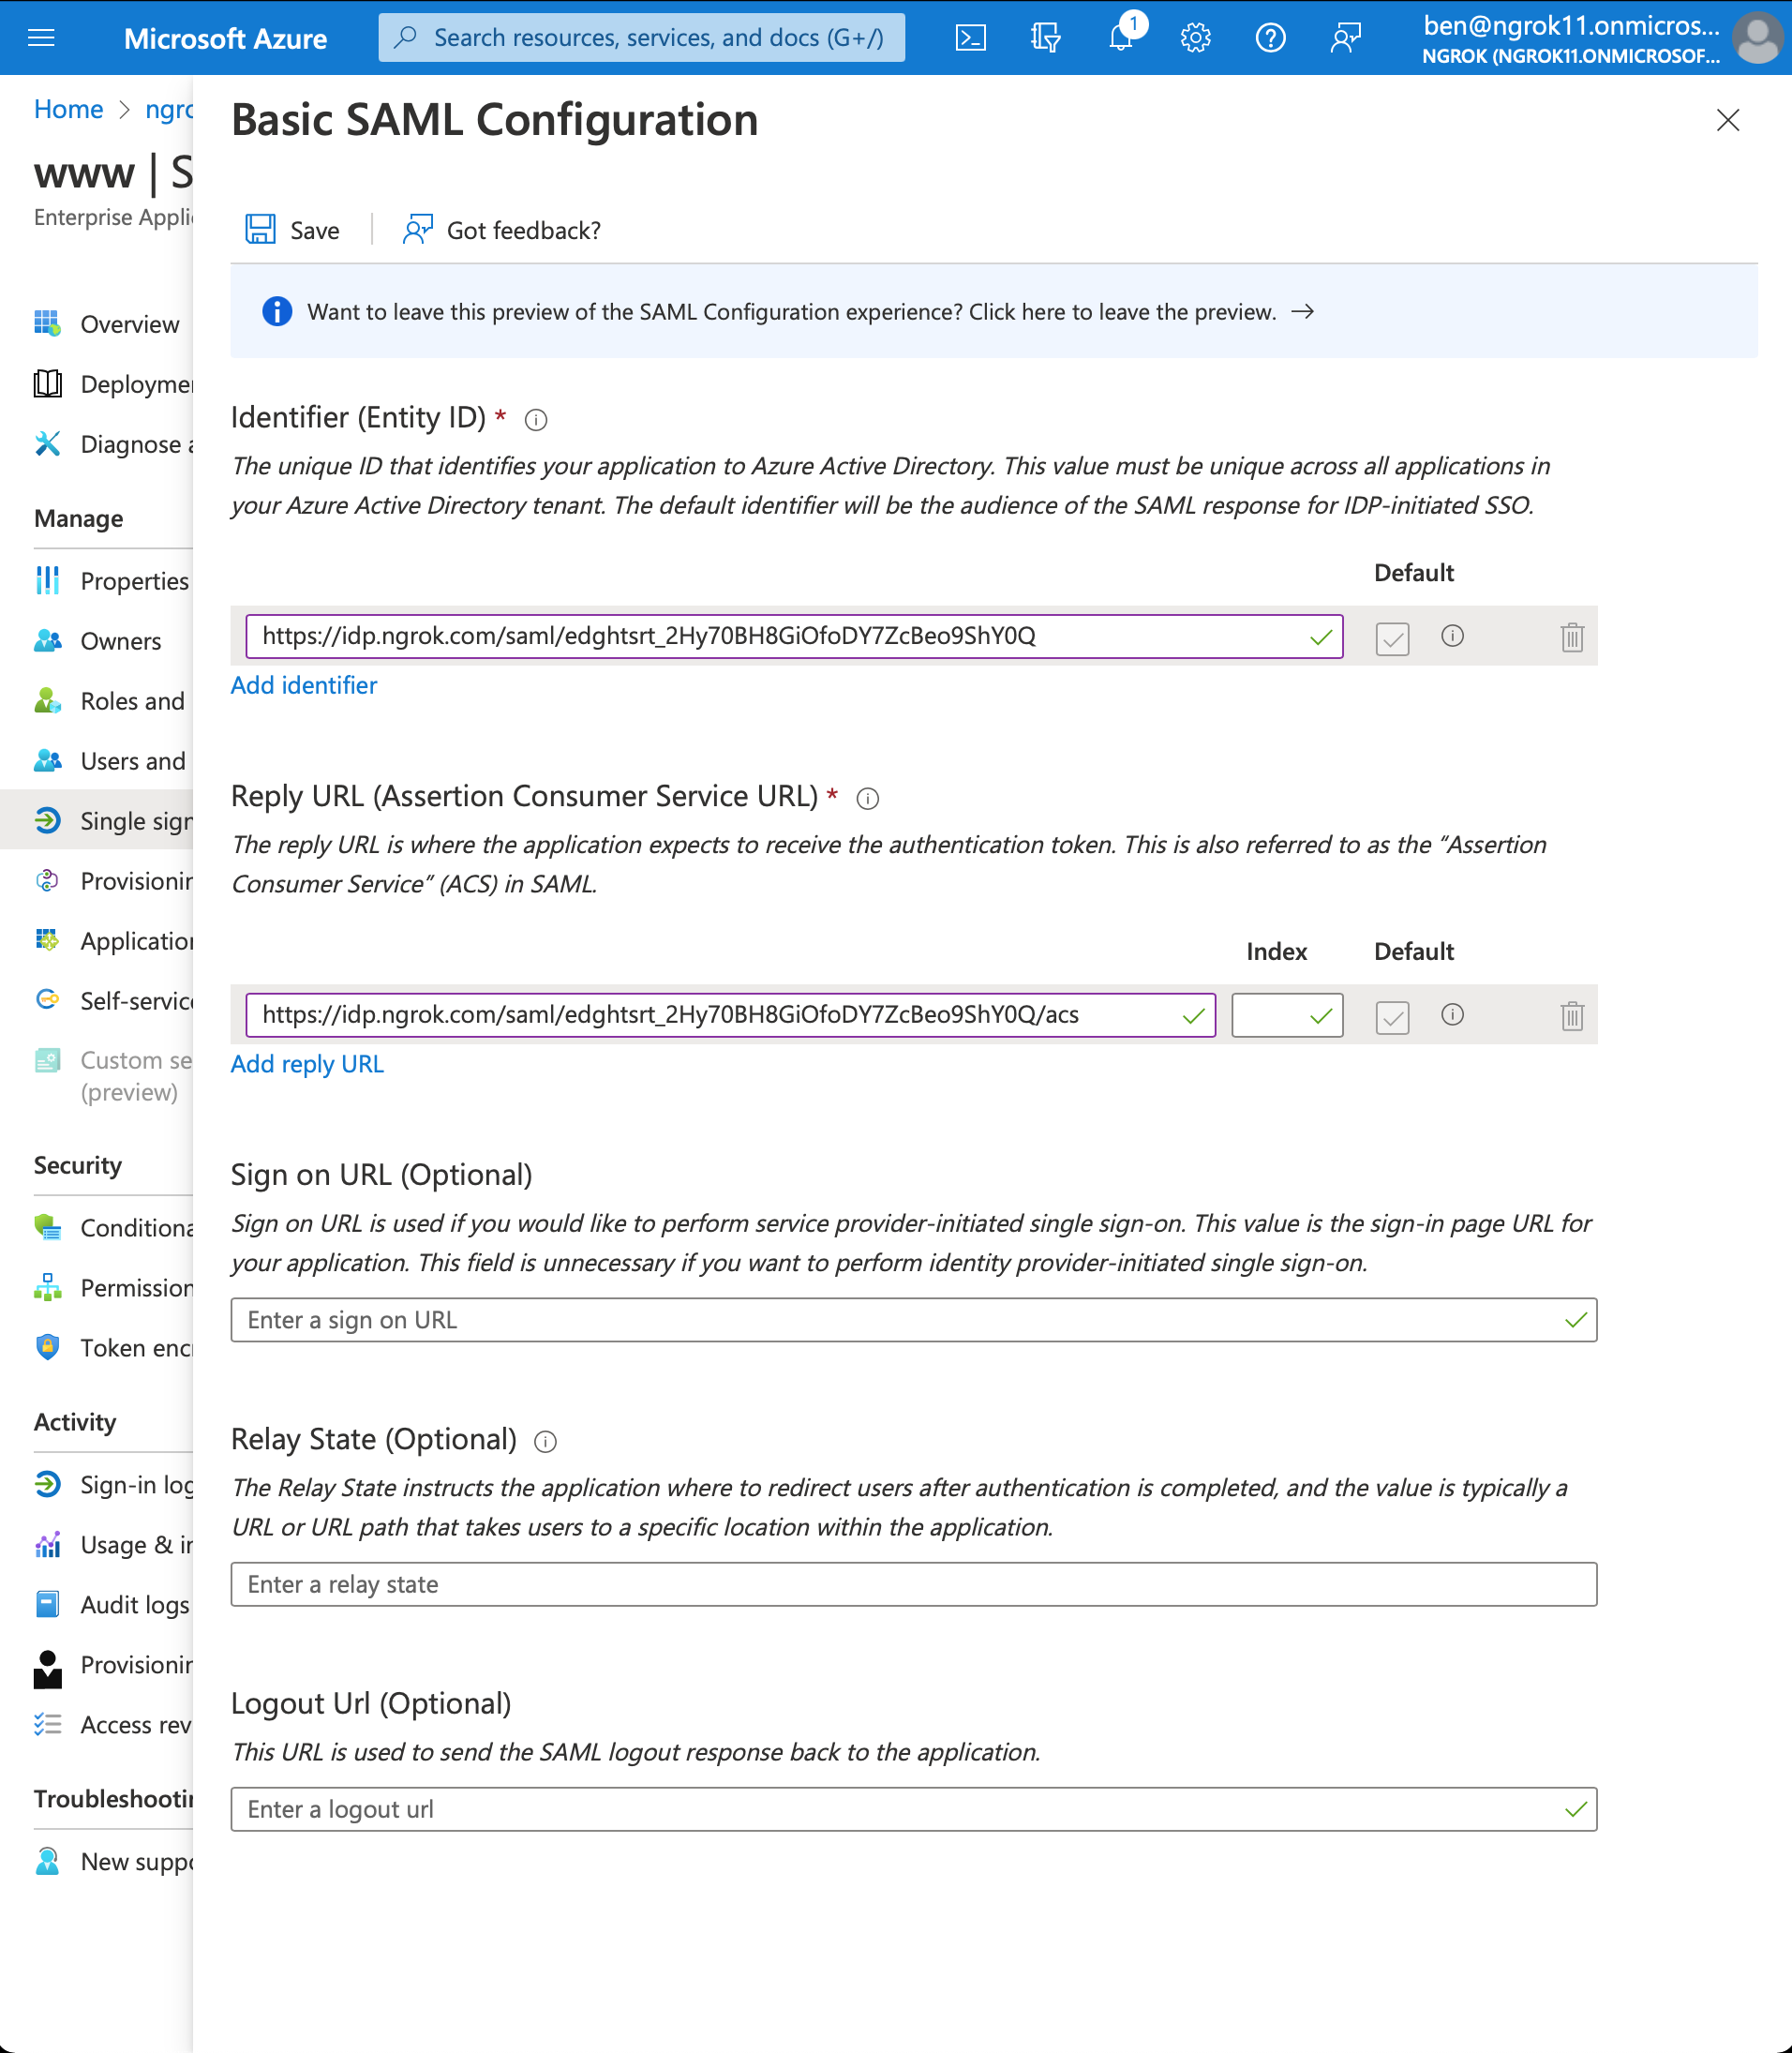
- Click Save
- Download the Metadata XML. In the SAML Certificates box > Token signing certificate section > click Download for the Federation Metadata XML
Step 3: Update the ngrok Edge with the IdP metadata
-
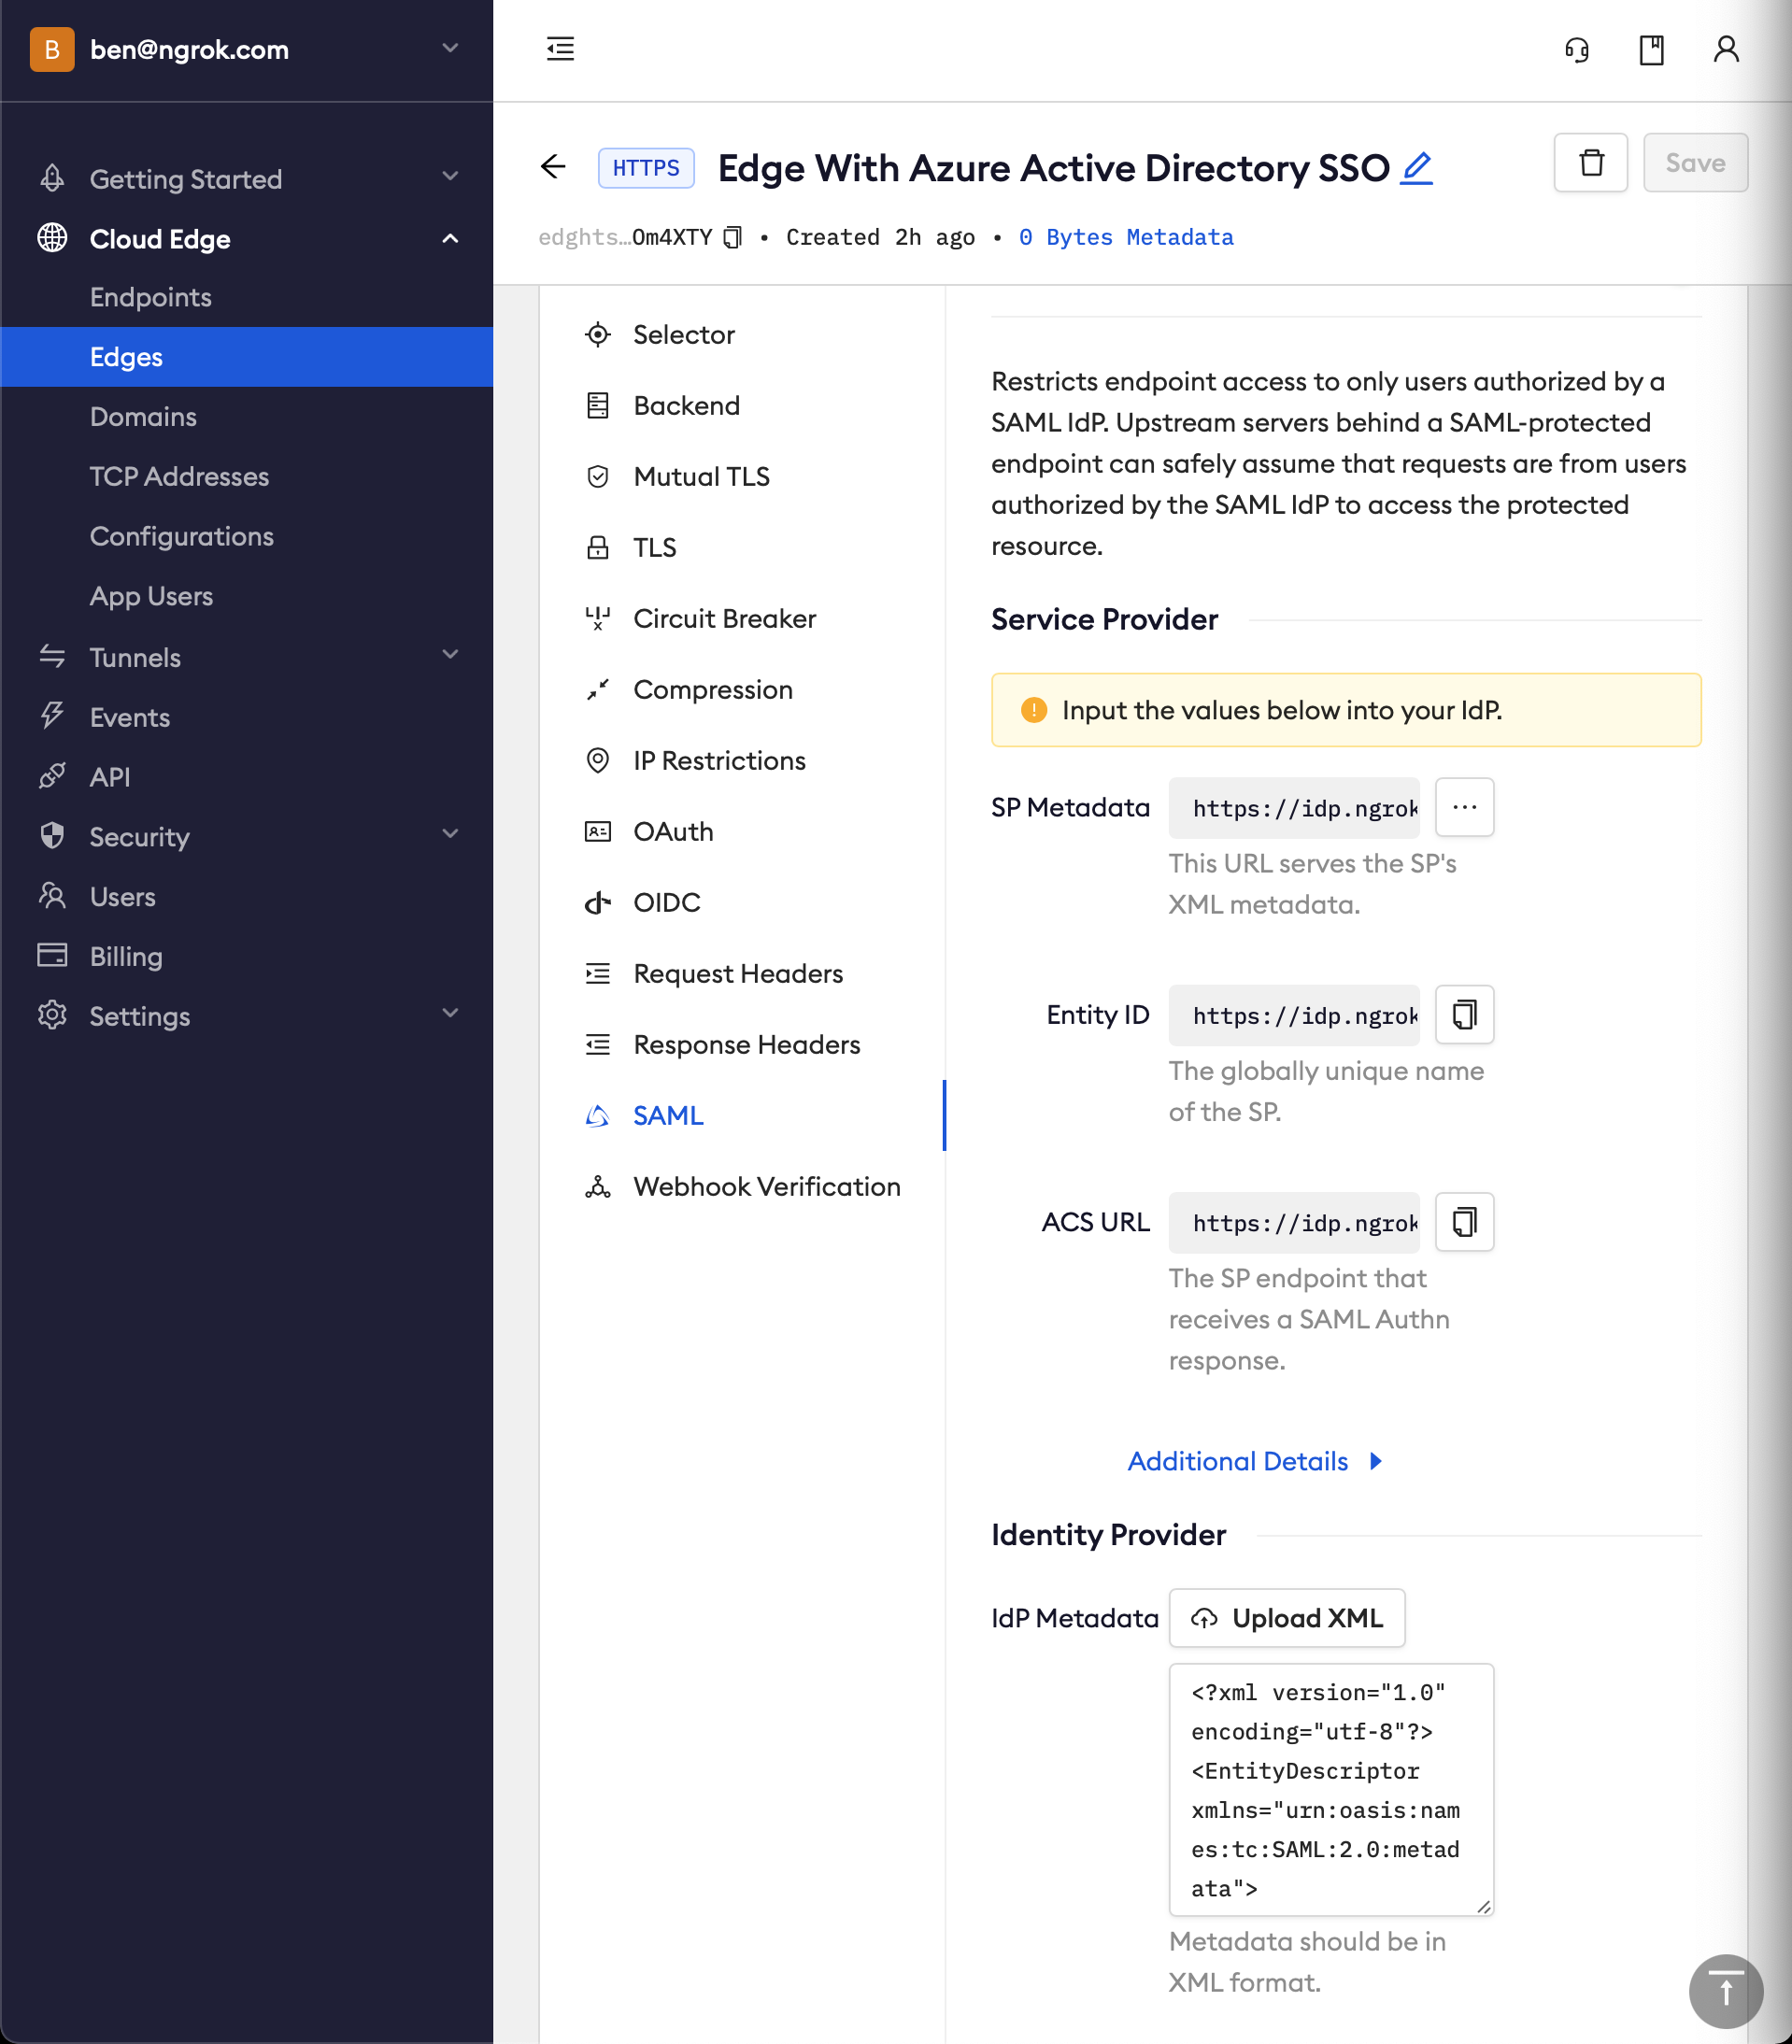
Back in the ngrok dashboard for your Edge's SAML configuration, upload the XML file generated by Azure AD
-
Click Save
Step 4: Test the integration
For this step, we assume you have an app running locally (i.e. on localhost:3000) with the ngrok client installed.
-
Launch a tunnel connected to your configured Edge
-
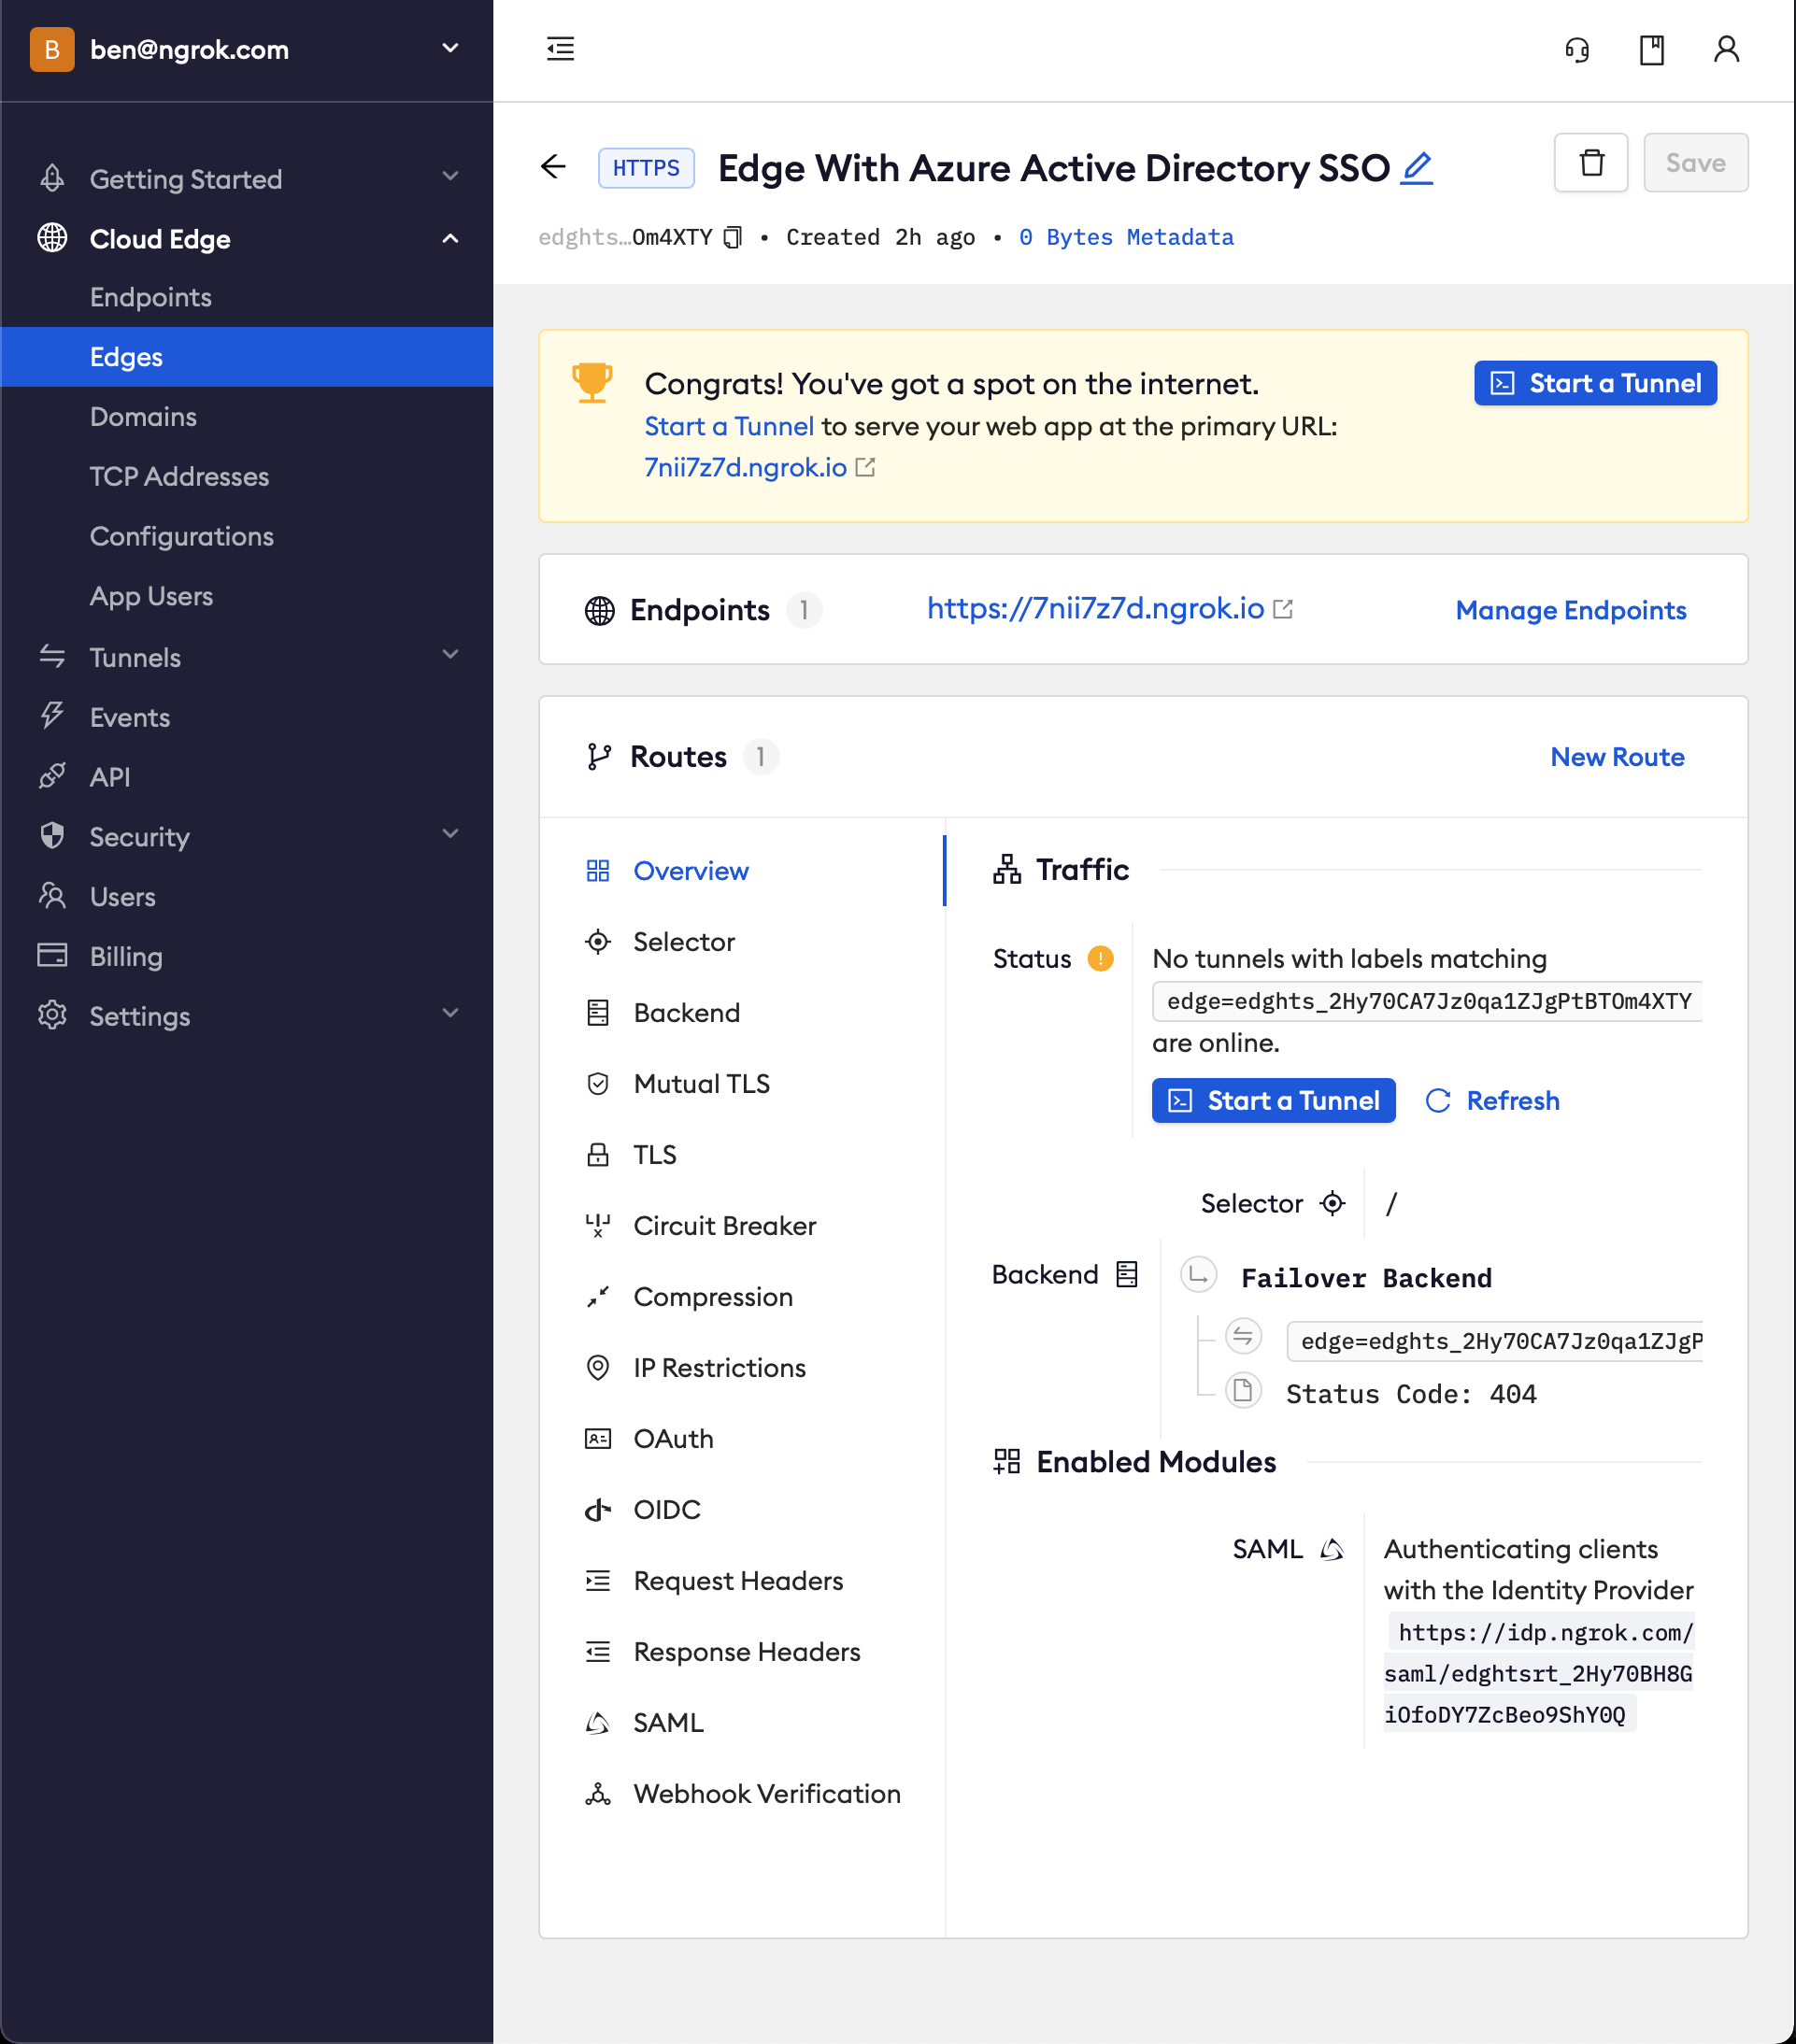
On your Edge's page, in the Routes section, click Start a tunnel
-
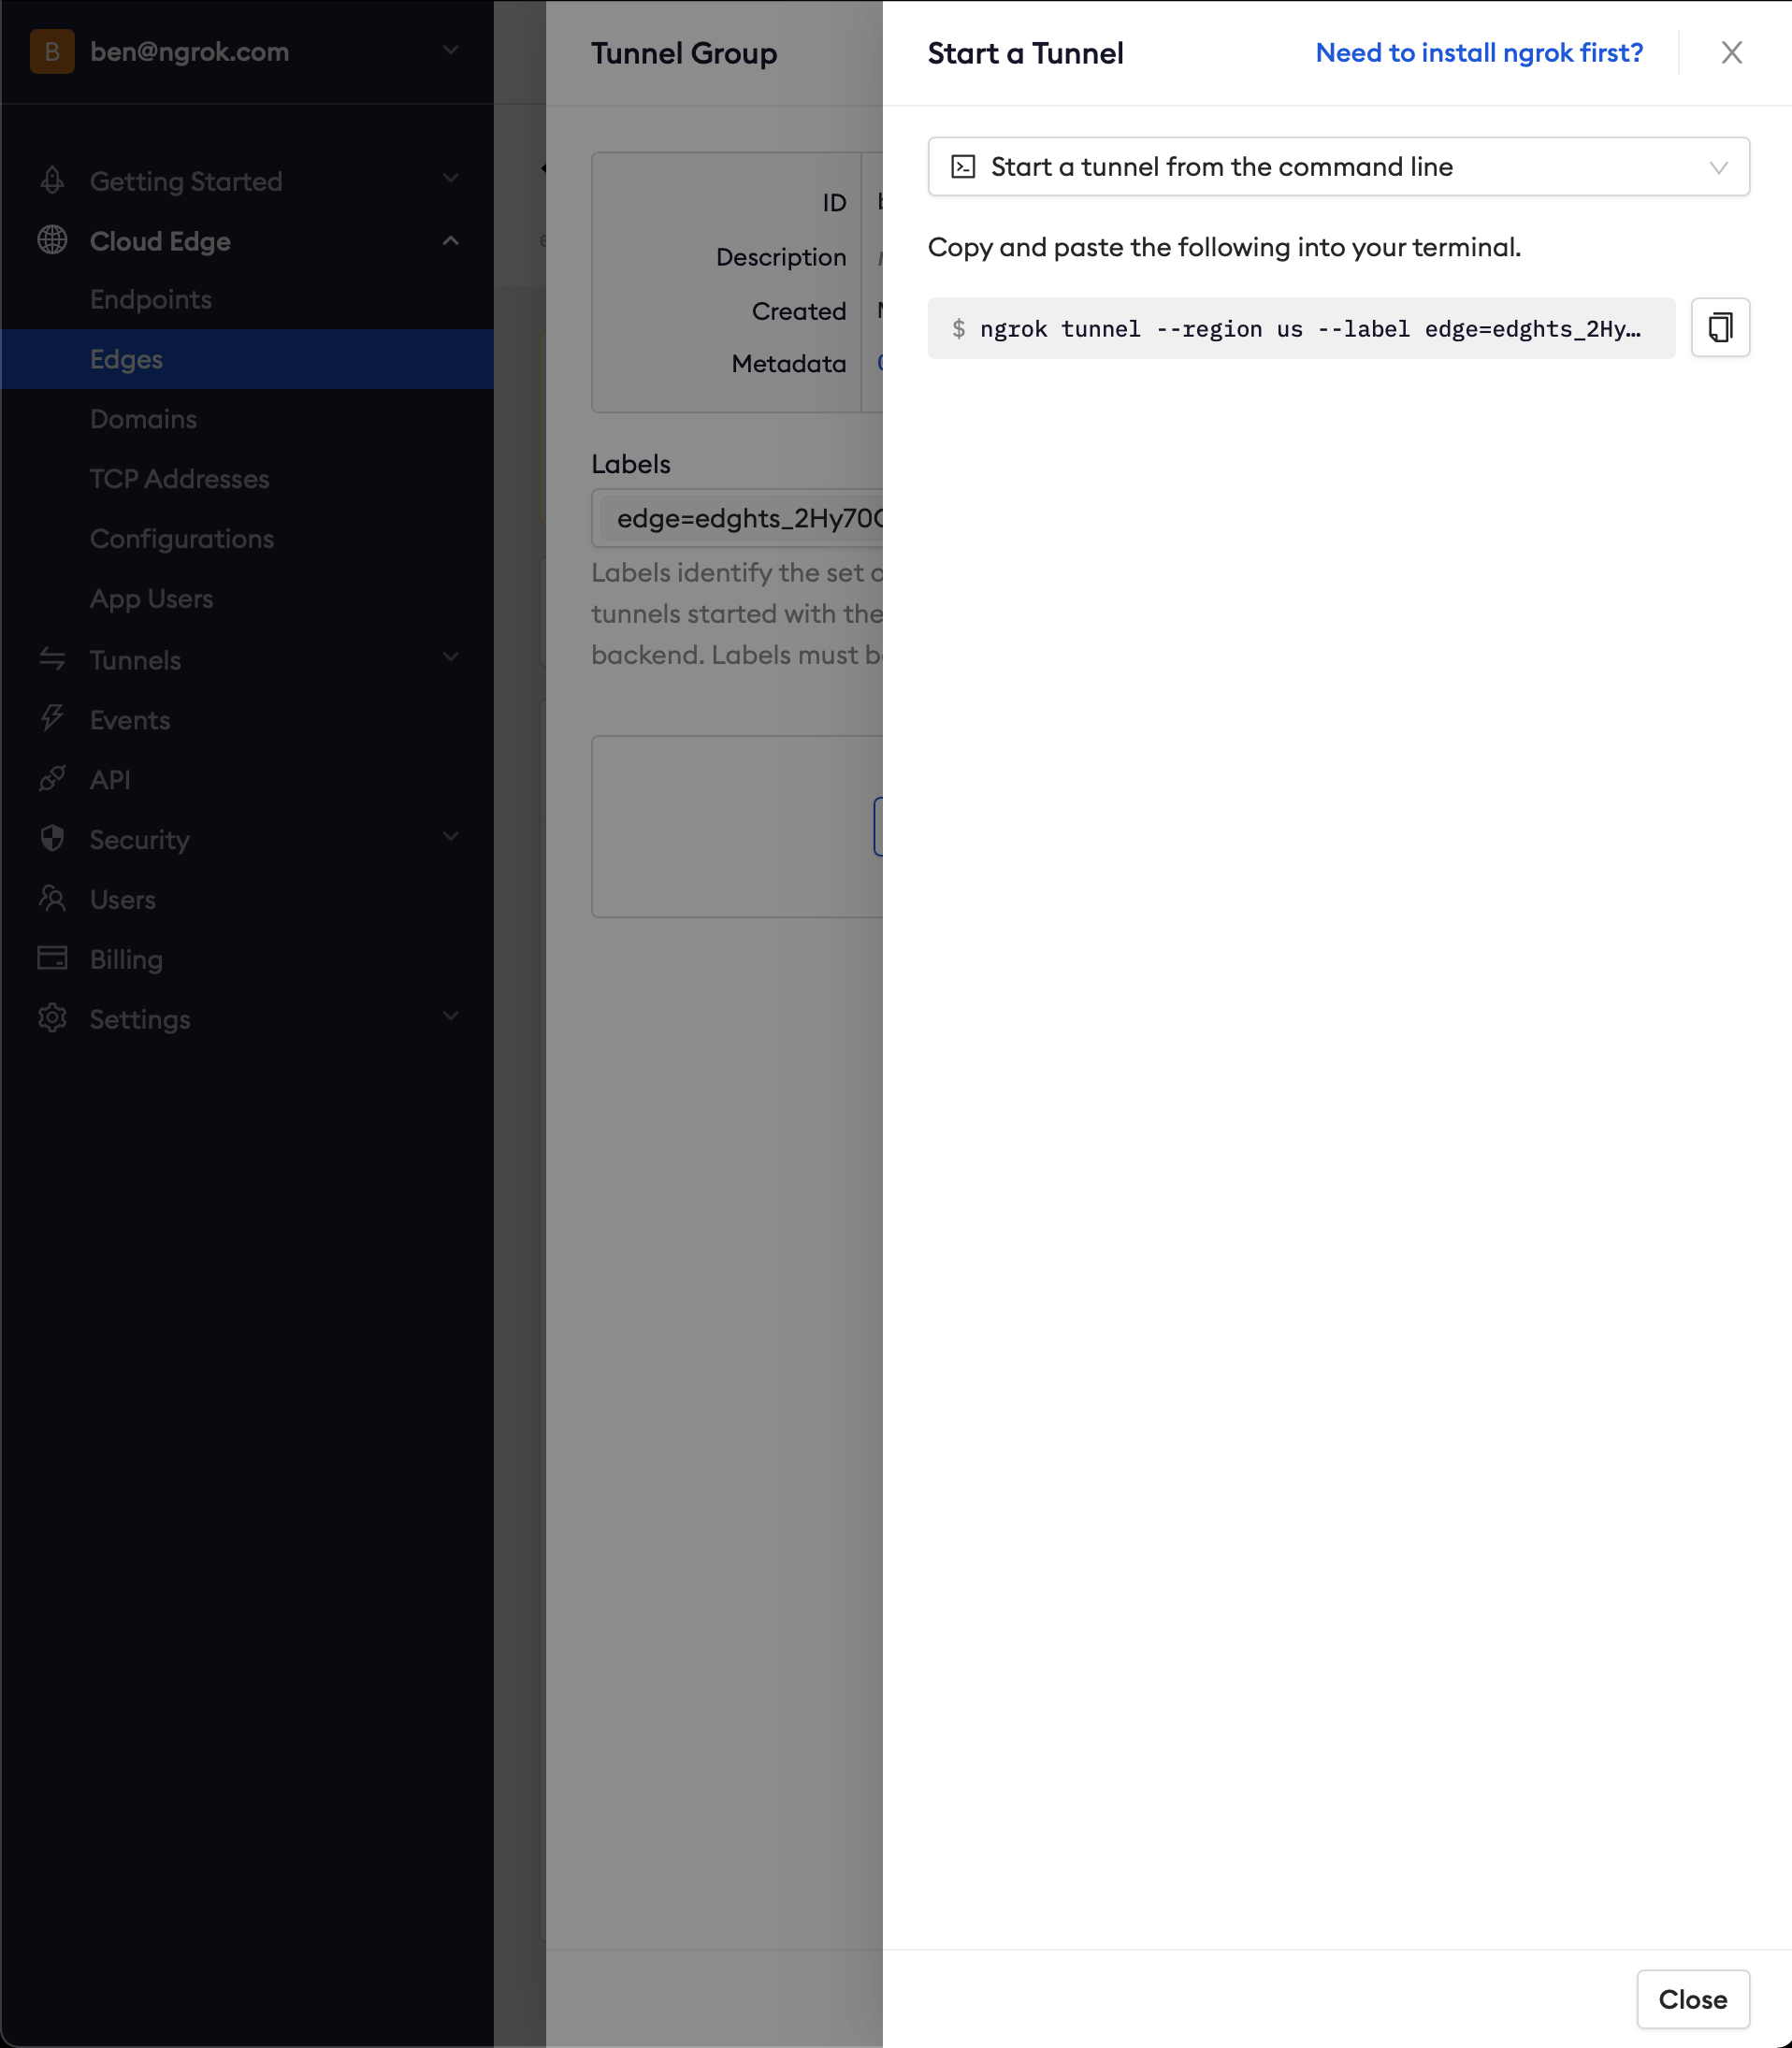
Copy the tunnel command
-
Launch a terminal and paste the command, replacing
http://localhost:80with your local web app address (e.g.,http://localhost:3000) -
Hit Enter to launch the tunnel
-
Confirm that the tunnel is connected to your edge
- Return to the ngrok dashboard
- Close the Start a tunnel and the Tunnel group drawers
- Refresh the Edge page
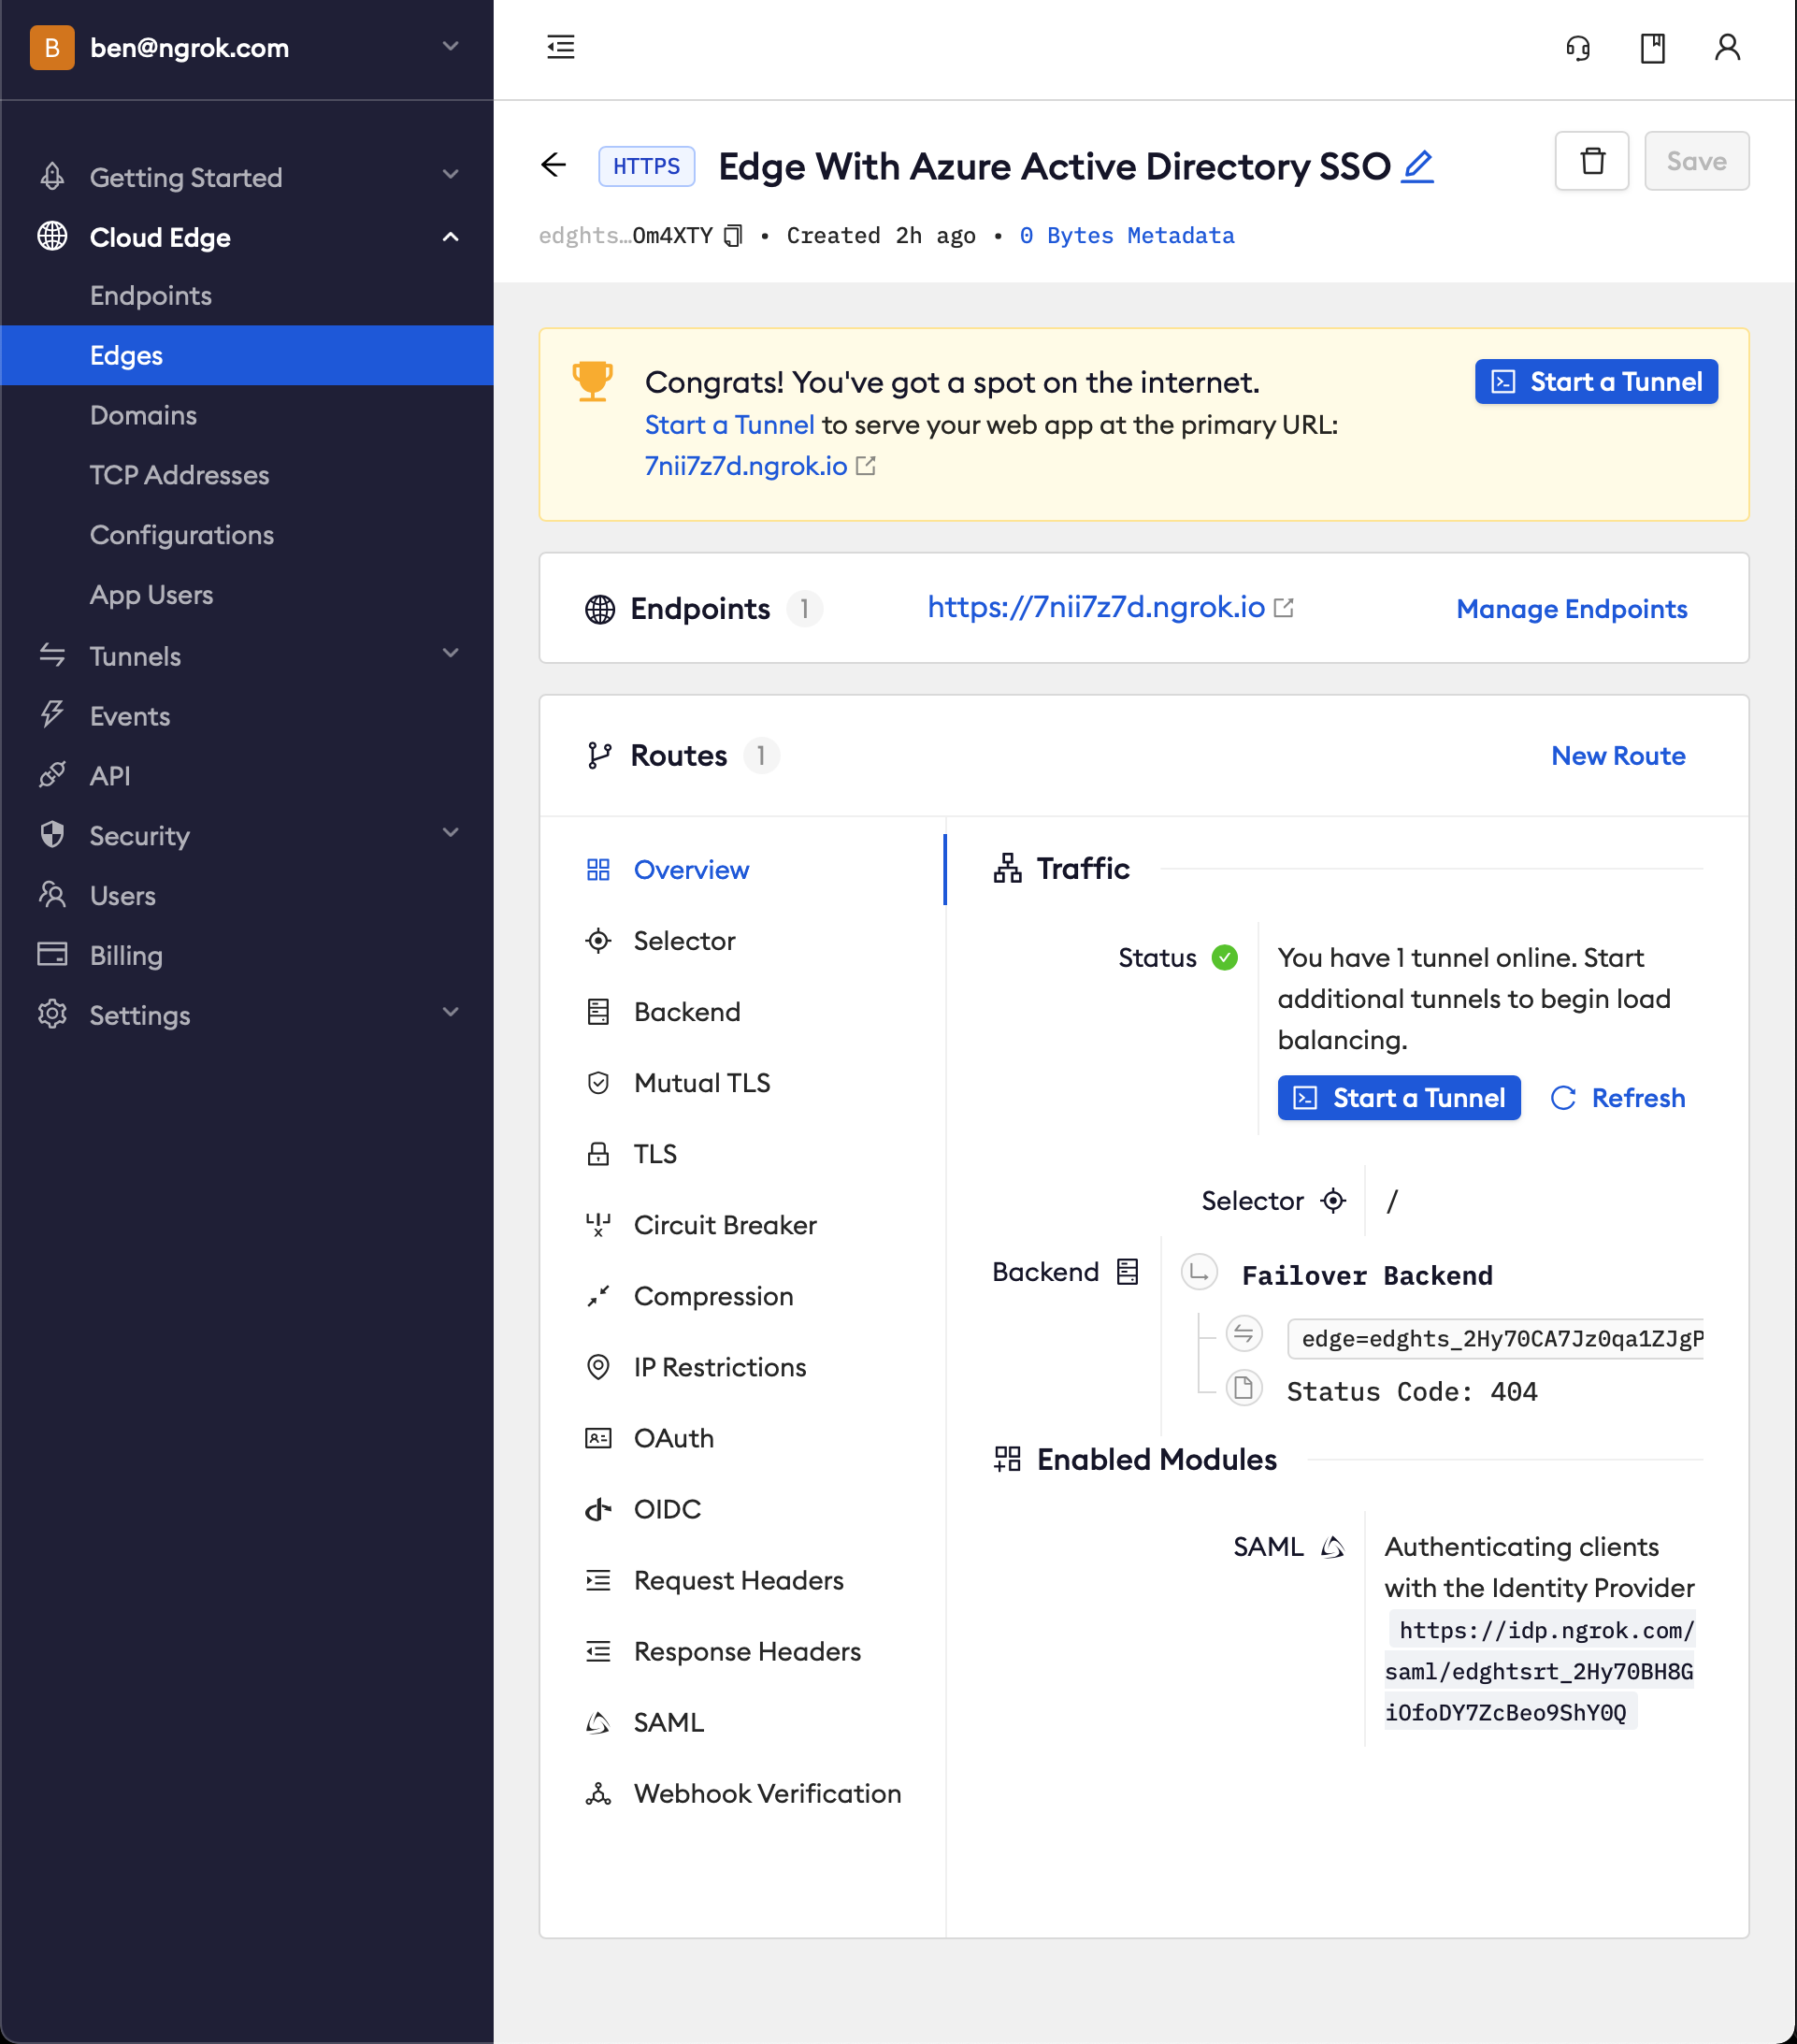
- In the Routes section > Traffic section you will see the message You have 1 tunnel online. Start additional tunnels to begin load balancing.
-
Copy the ngrok url on the Endpoints section
-
Access your Edge application
- In your browser, launch an incognito window
- Access your ngrok tunnel via your copied URL
- You should be prompted to log in with your Microsoft credentials
- After login, you should be able to see the application
Bonus: Configure ngrok to enforce authorization based on Azure groups
-
In Azure, configure the SAML response to include group claims. In the Attributes & Claims box click Edit
-
Click Add a group claim > Advanced options > Customize the name of the group claim
-
Set the name of the group claim to
groups. This specific value is required for ngrok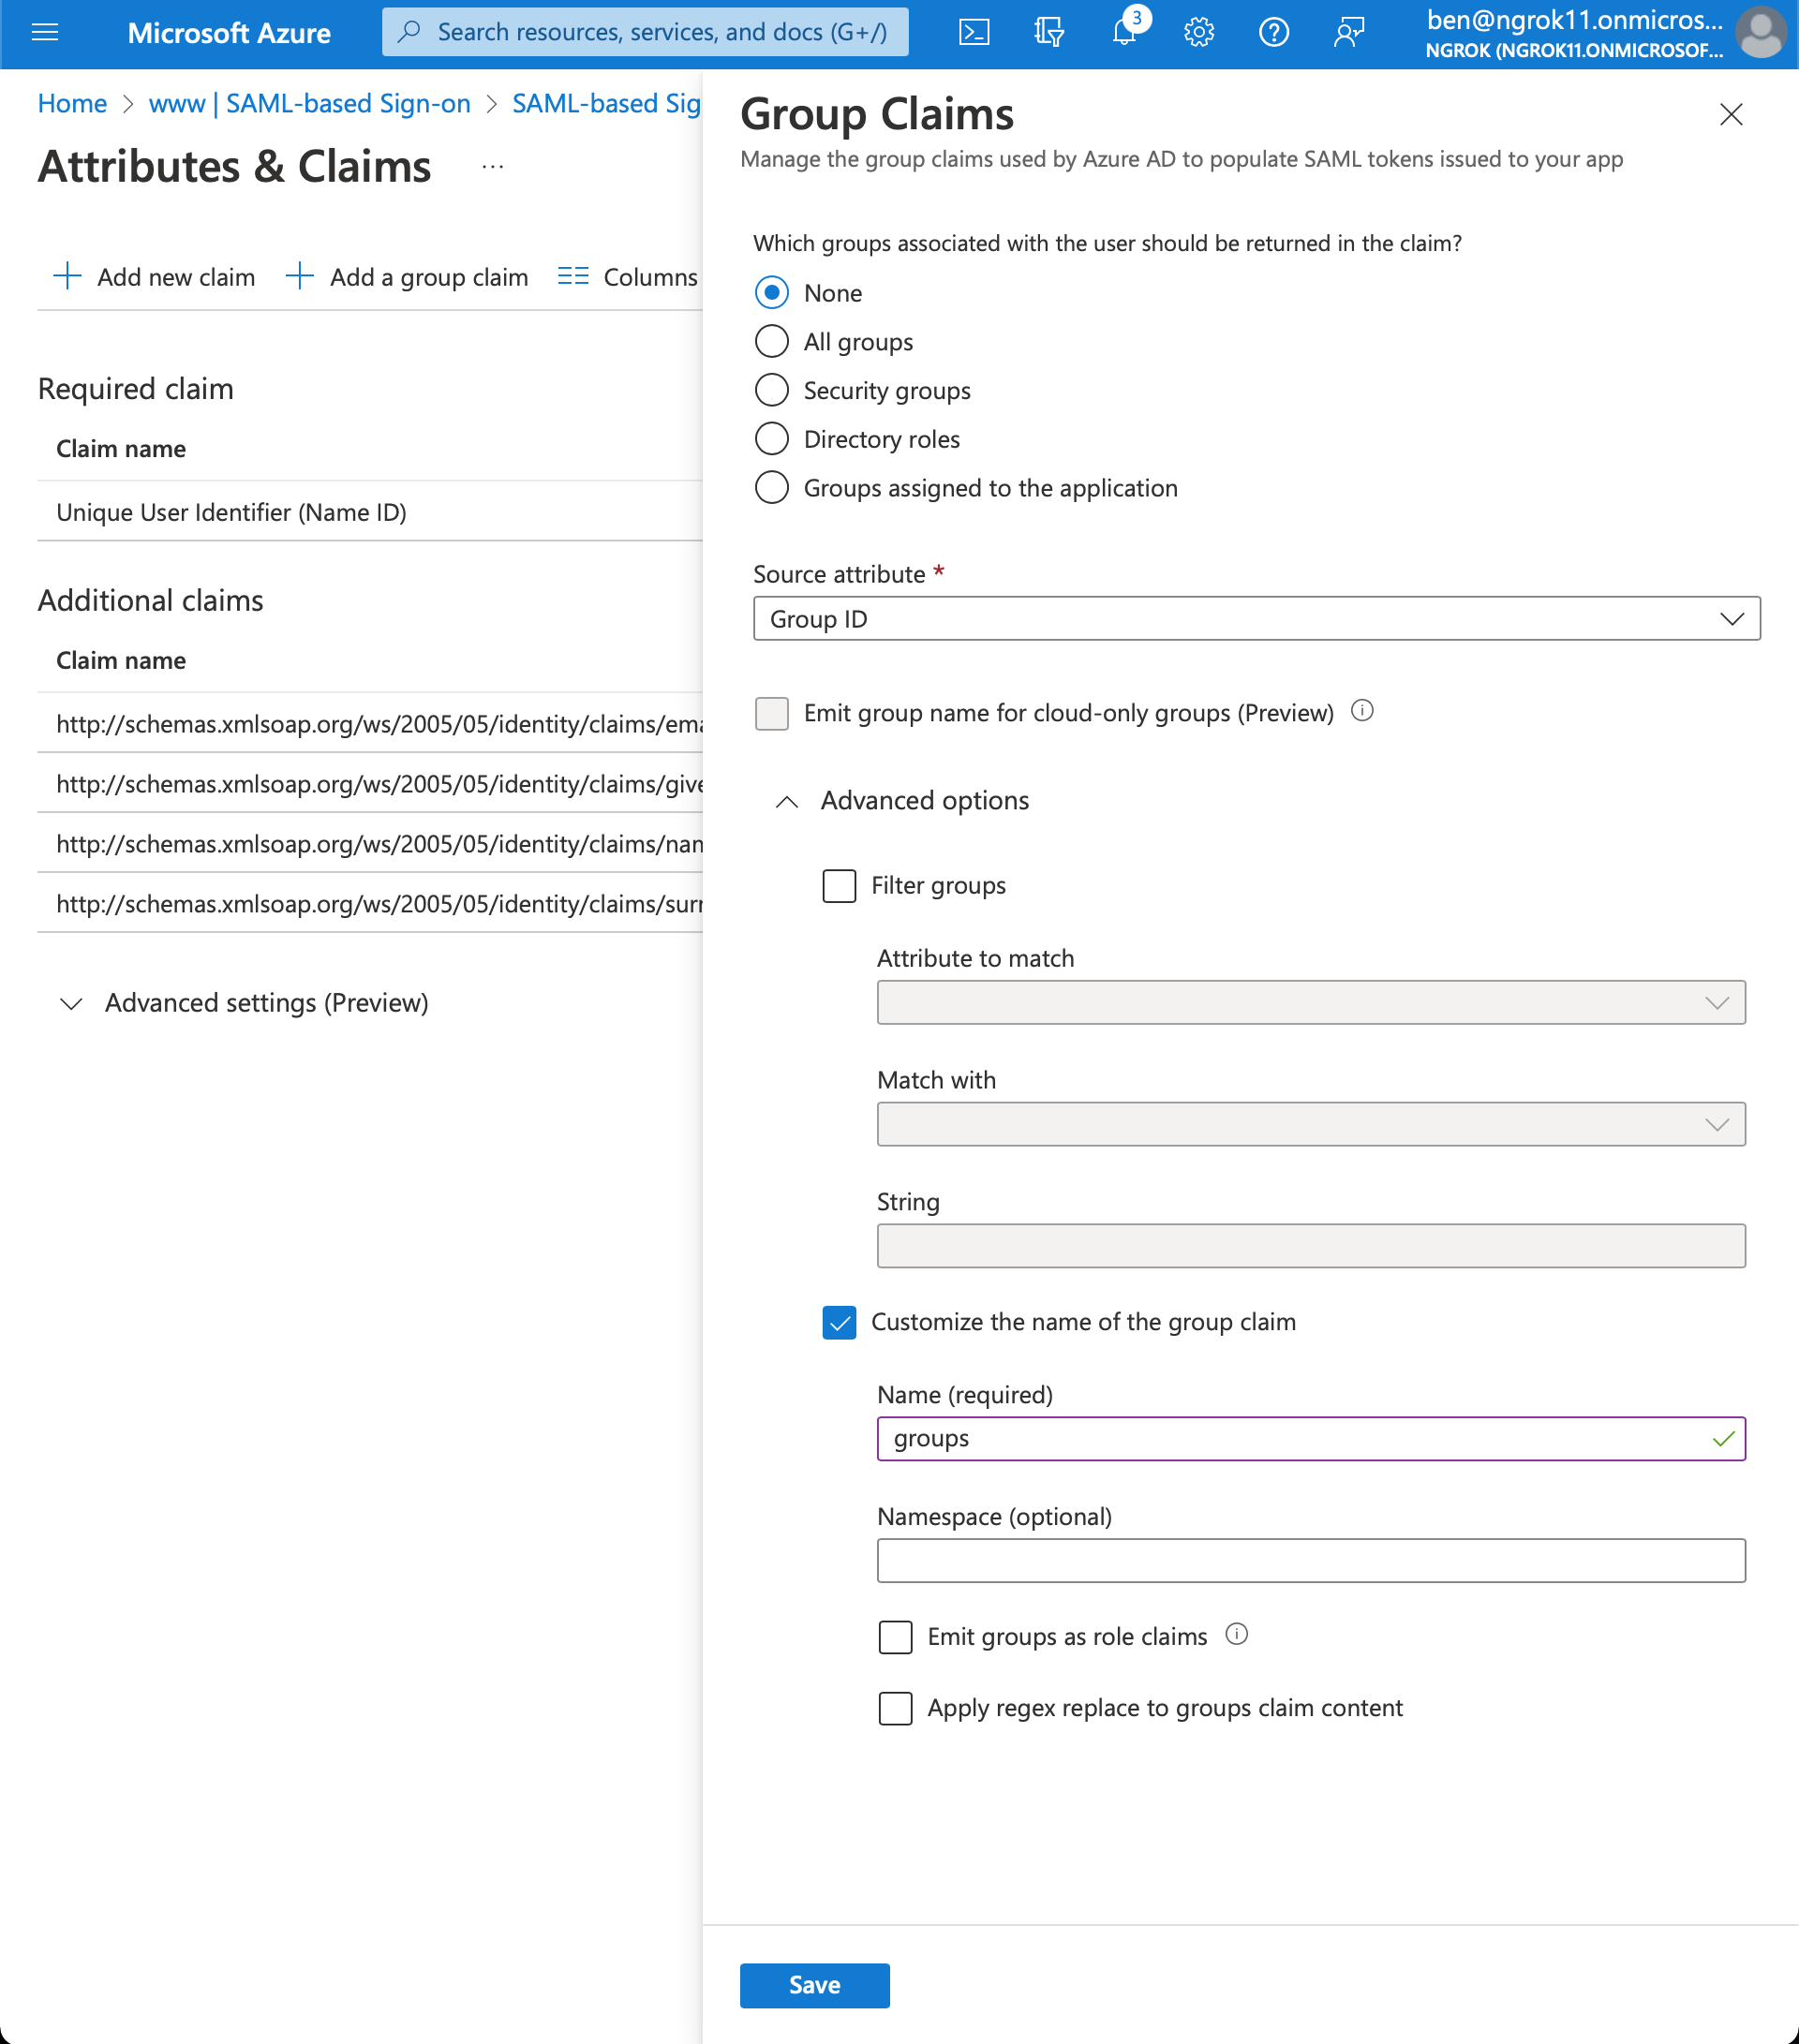
-
Click Save
-
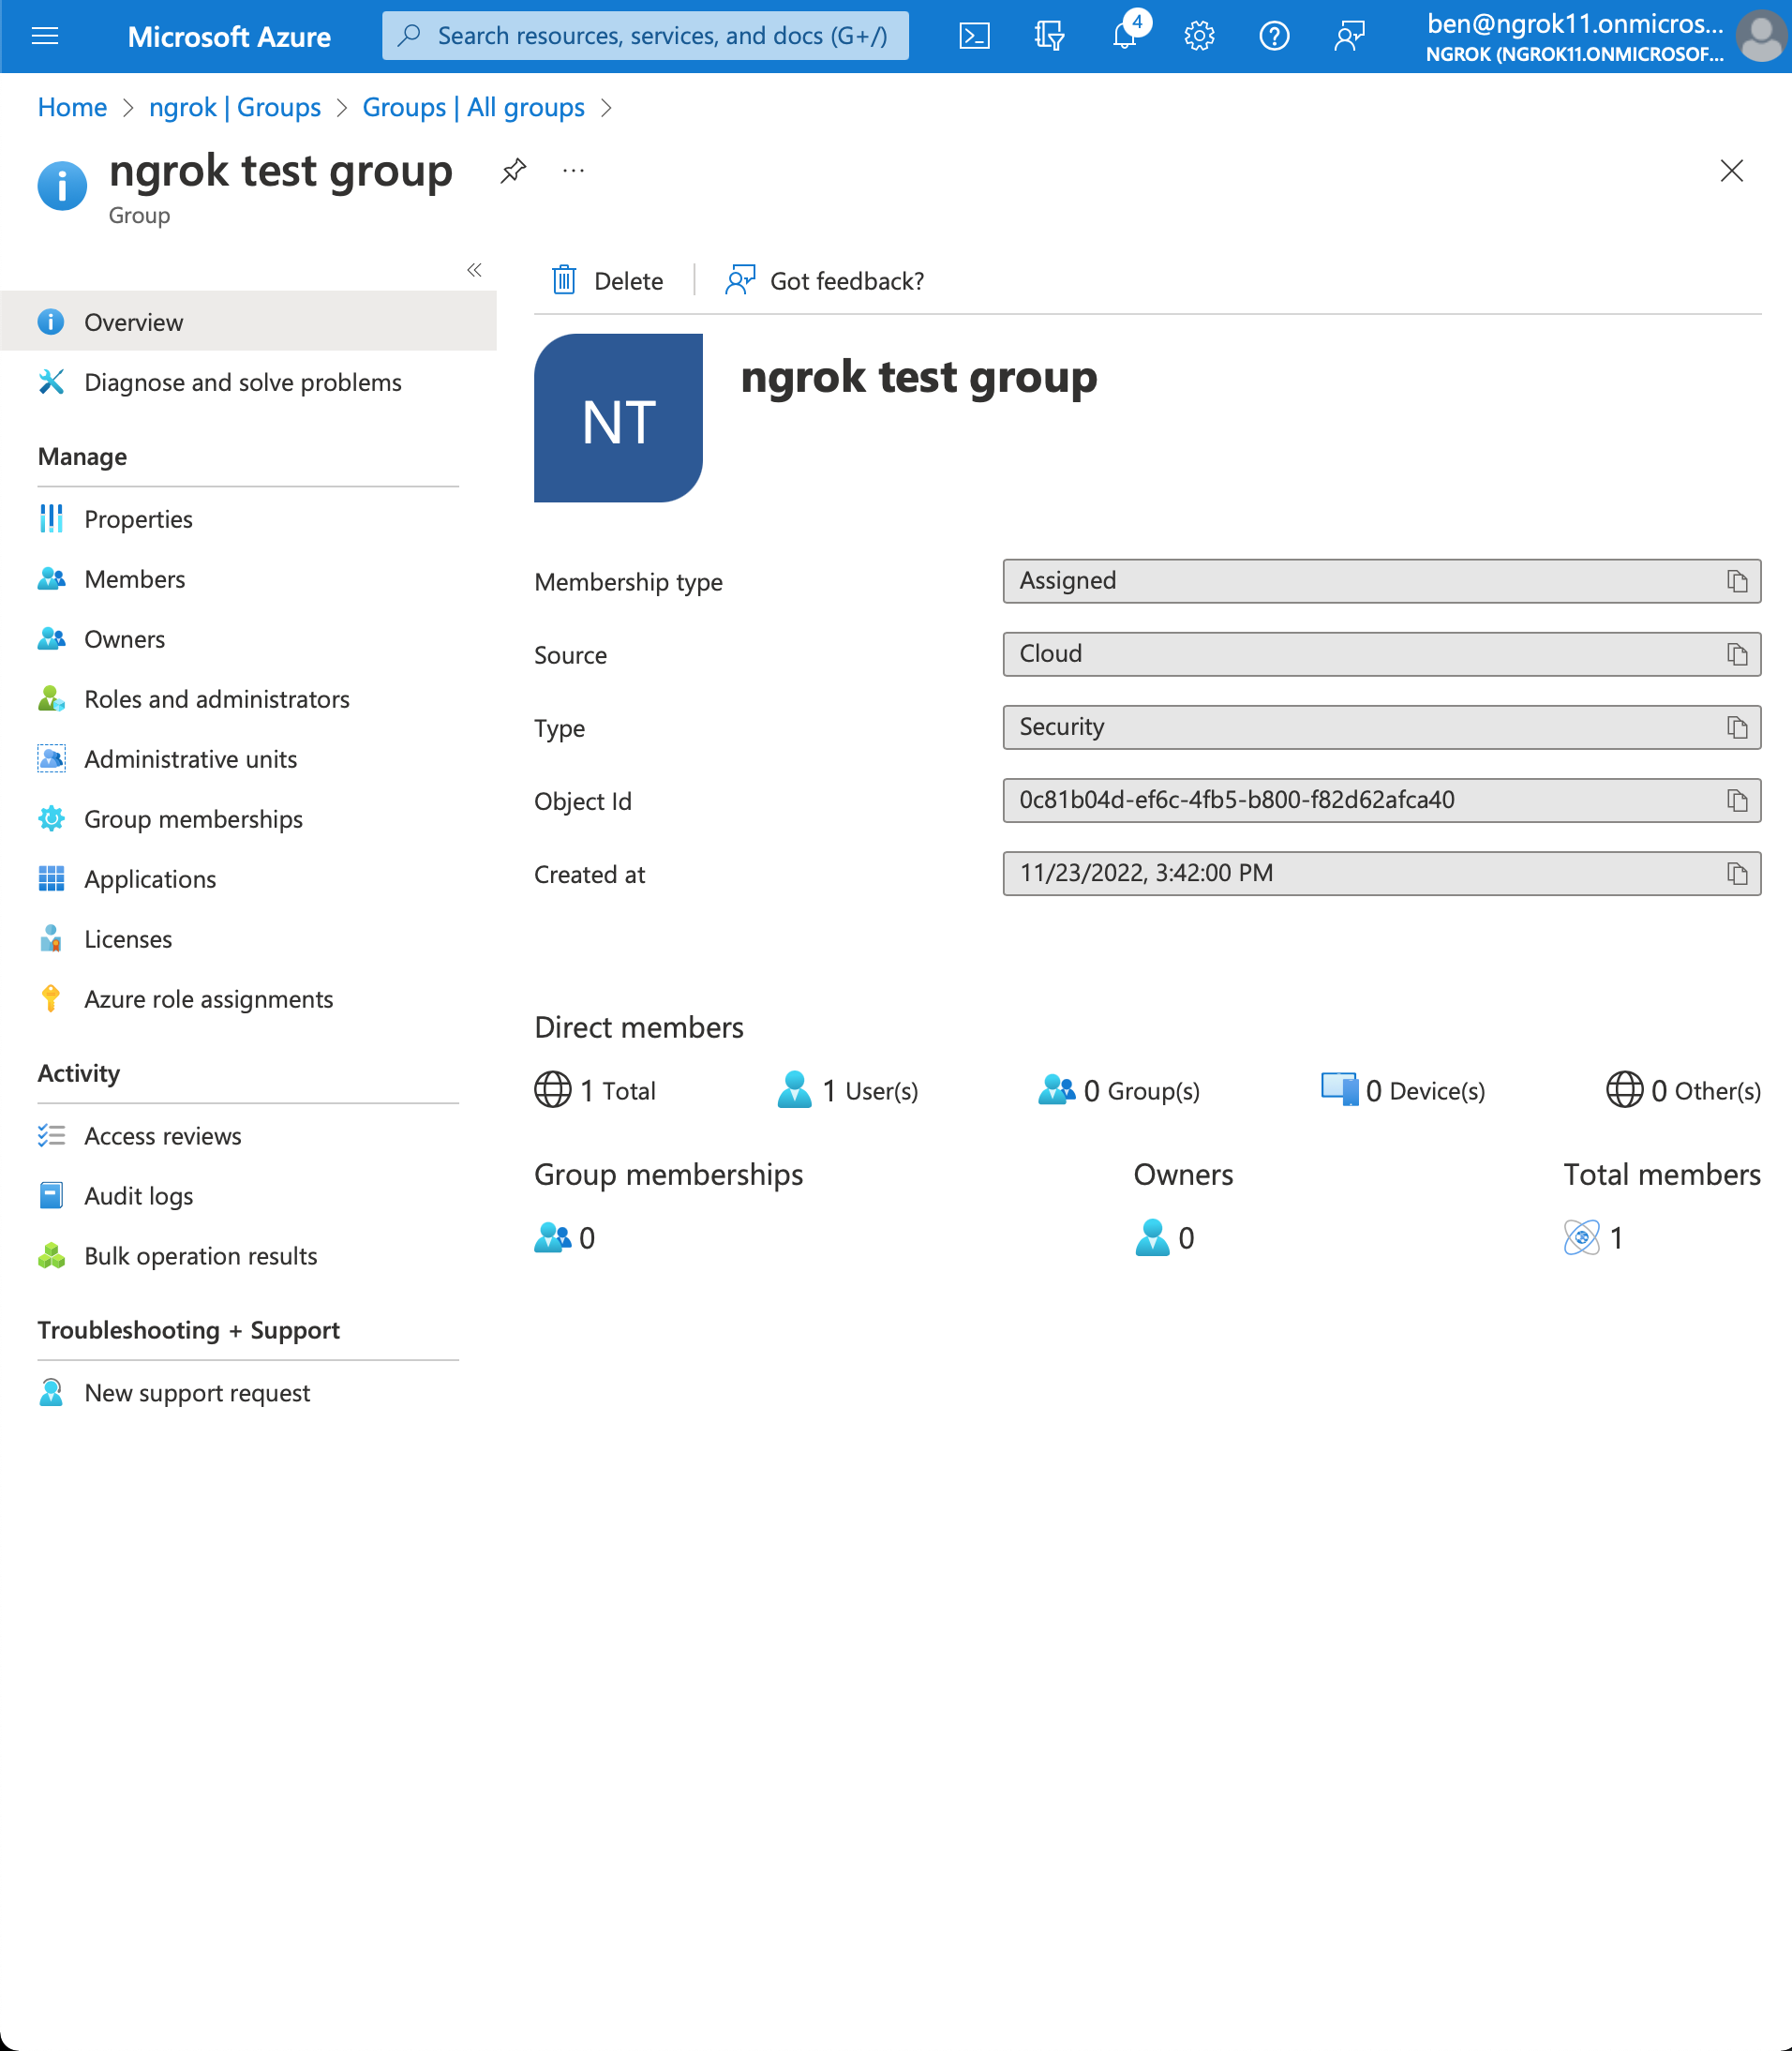
Go to your group page and copy the object Id (Azure AD returns group object Ids in the group claim)
-
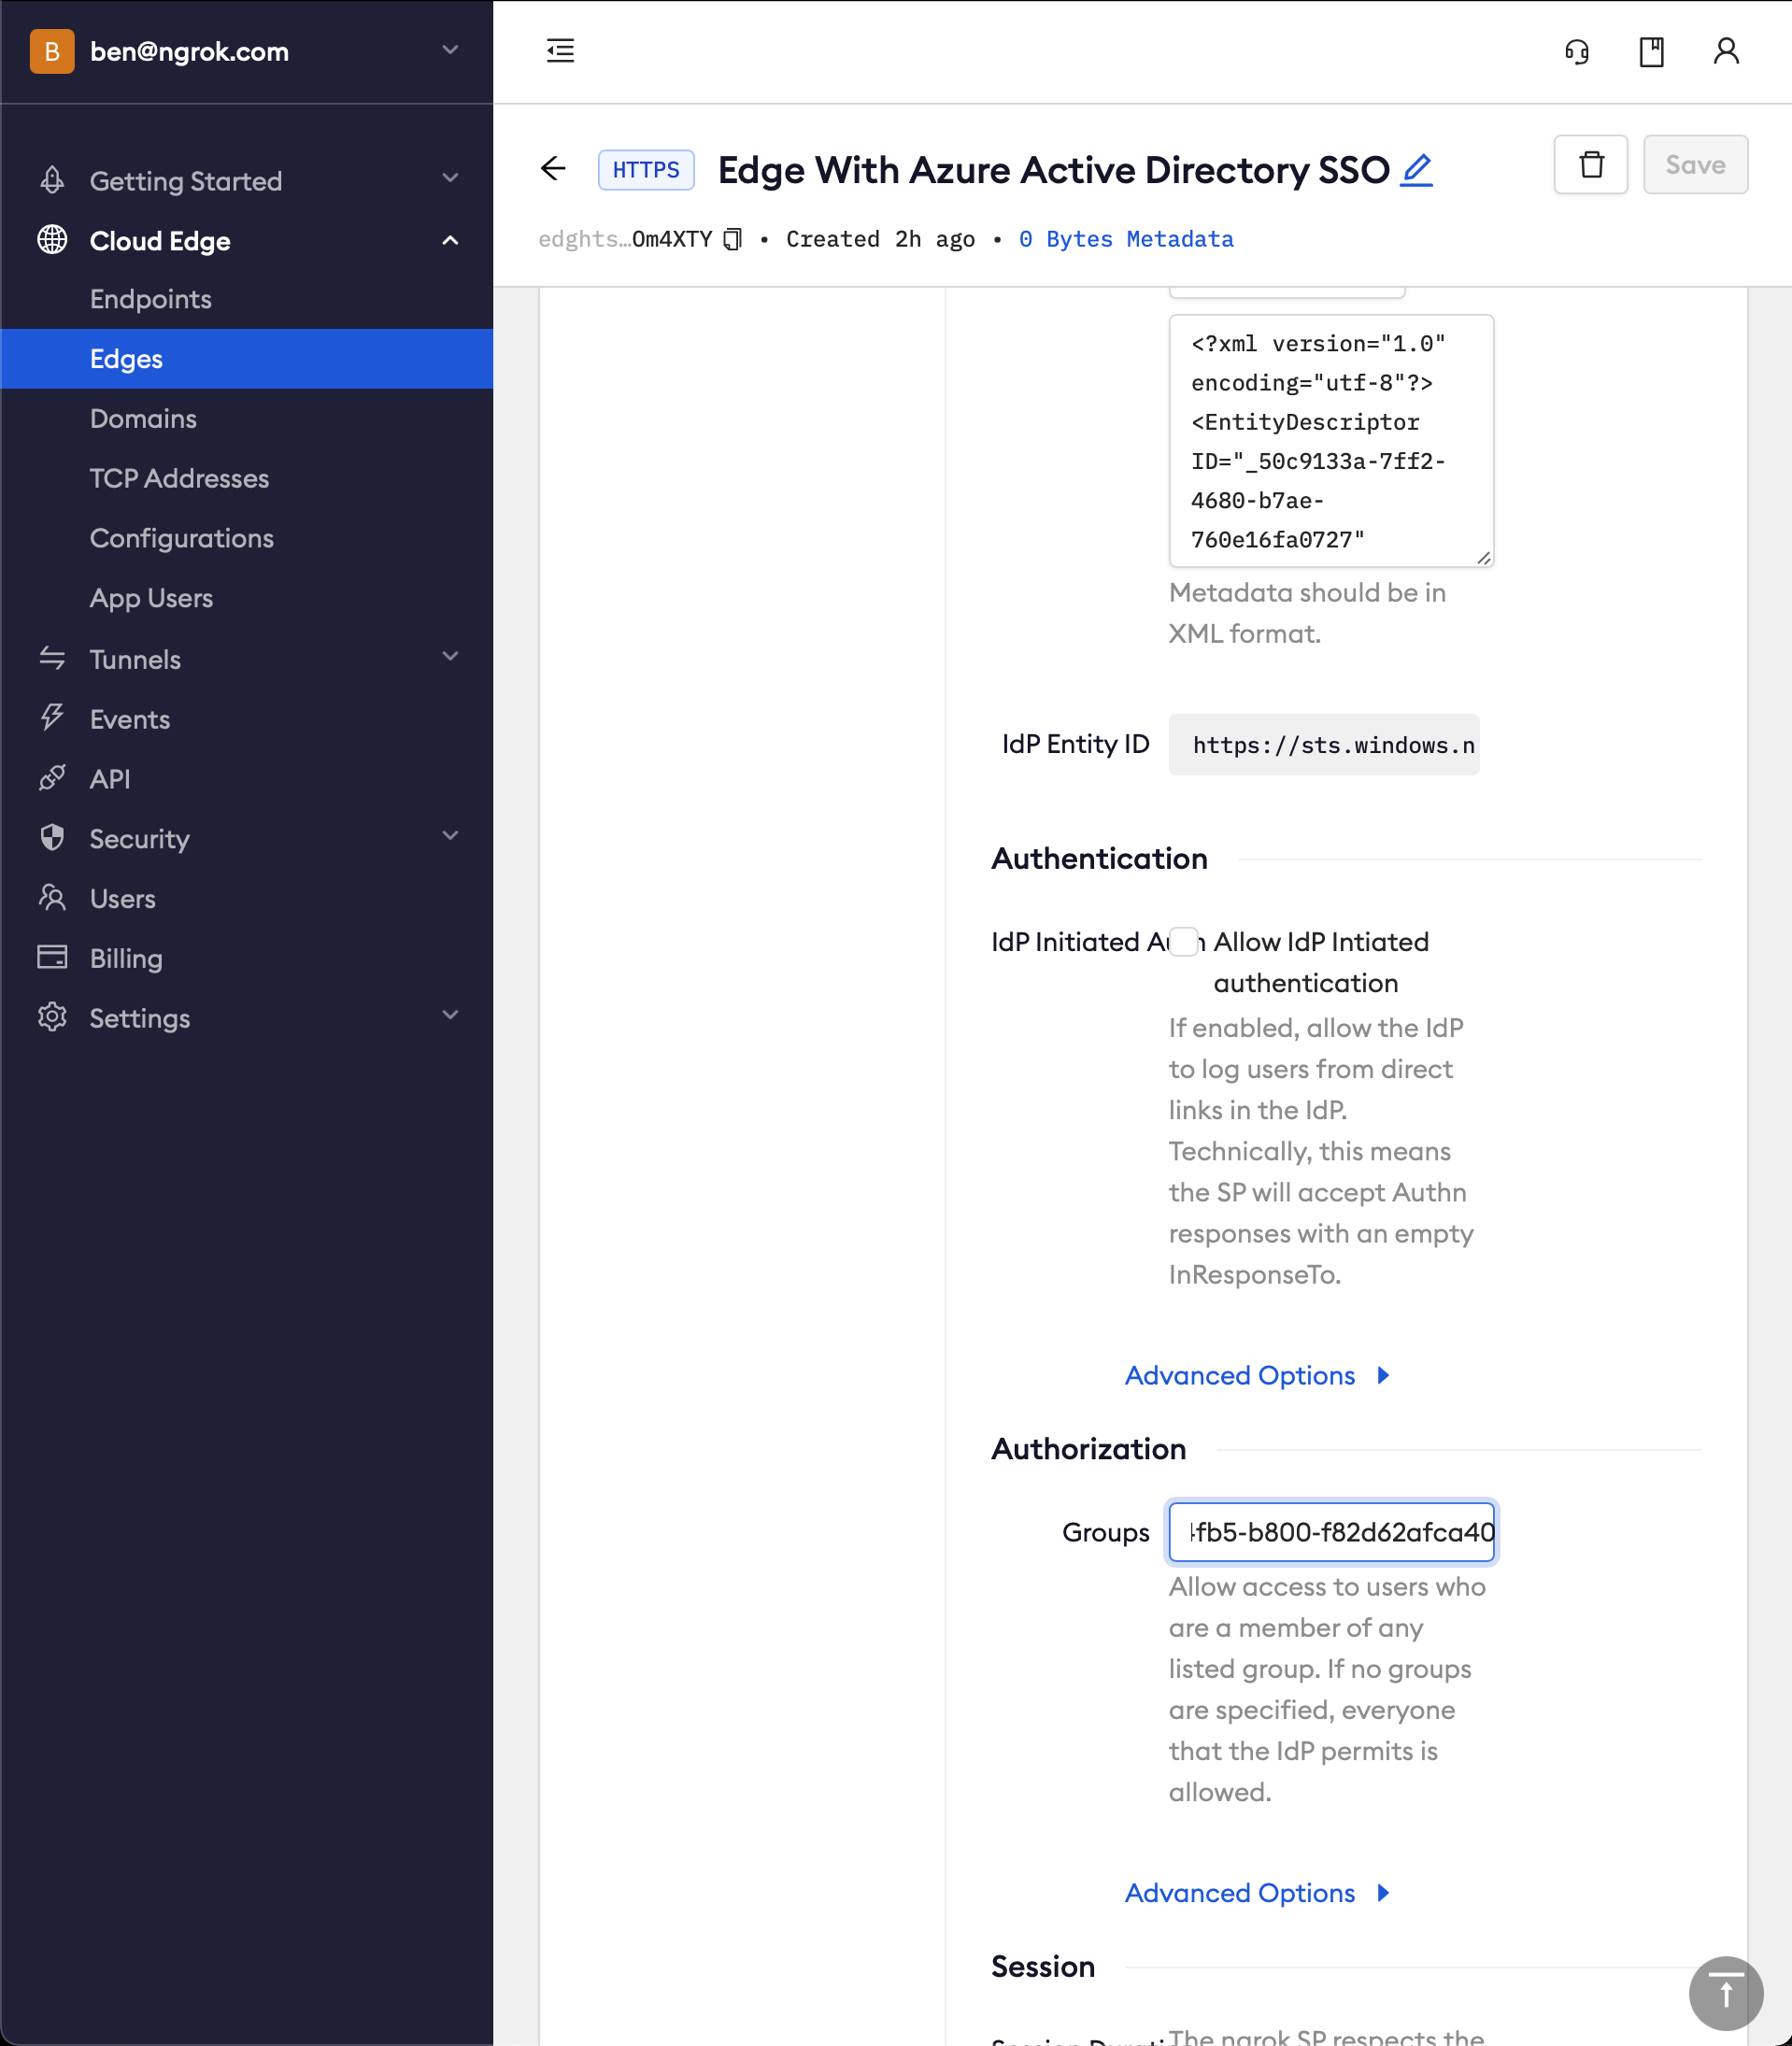
Configure ngrok to enforce group authorization. In ngrok on your Edge's page, in the Authorization section, update the groups input with your Azure group object Id (NOT group name) values
-
Access your Edge application
- In your browser, launch an incognito window
- Access your ngrok tunnel via your copied URL
- You should be prompted to log in with your Microsoft credentials
- Only users assigned to the authorized groups will have access to the application